A Beginner's Guide To Tarp Camping | Backpacking Advice - Outdoors Magic

Outdoors Gear, Equipment, News, Reviews, Forums, Walking Routes and More at OutdoorsMagic.com

Share

How To Guides

A Beginner’s Guide To Tarp Camping | Backpacking Advice

Don't know your A-Frame from your Lean-To? Here's how to perfectly rig a tarp for a safe, stable and dry night under the stars

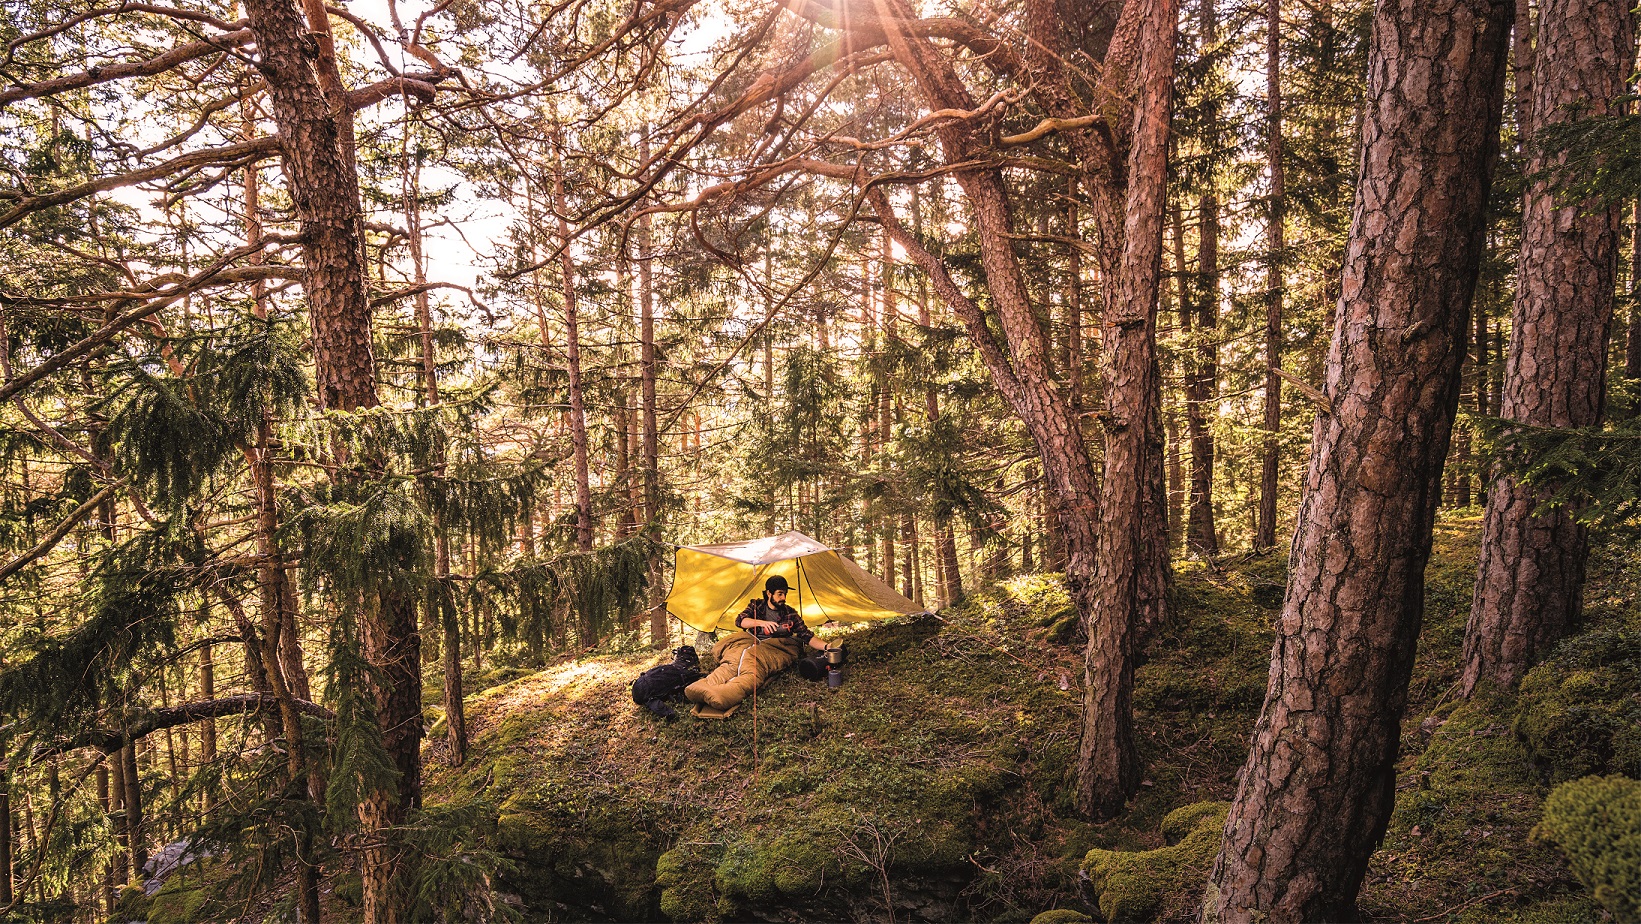
Tents are boring, tarps are epic. That’s the view of a growing number of hardcore outdoor enthusiasts, who are drawn to the magical and minimalist experience of sleeping under a tarp. But why on earth would you ditch a high-performing, well-designed tent in favour of such a basic, simple shelter liable to leakage? And isn’t ‘tarping’ just for bushcraft-y types who are being different for the sake of it?

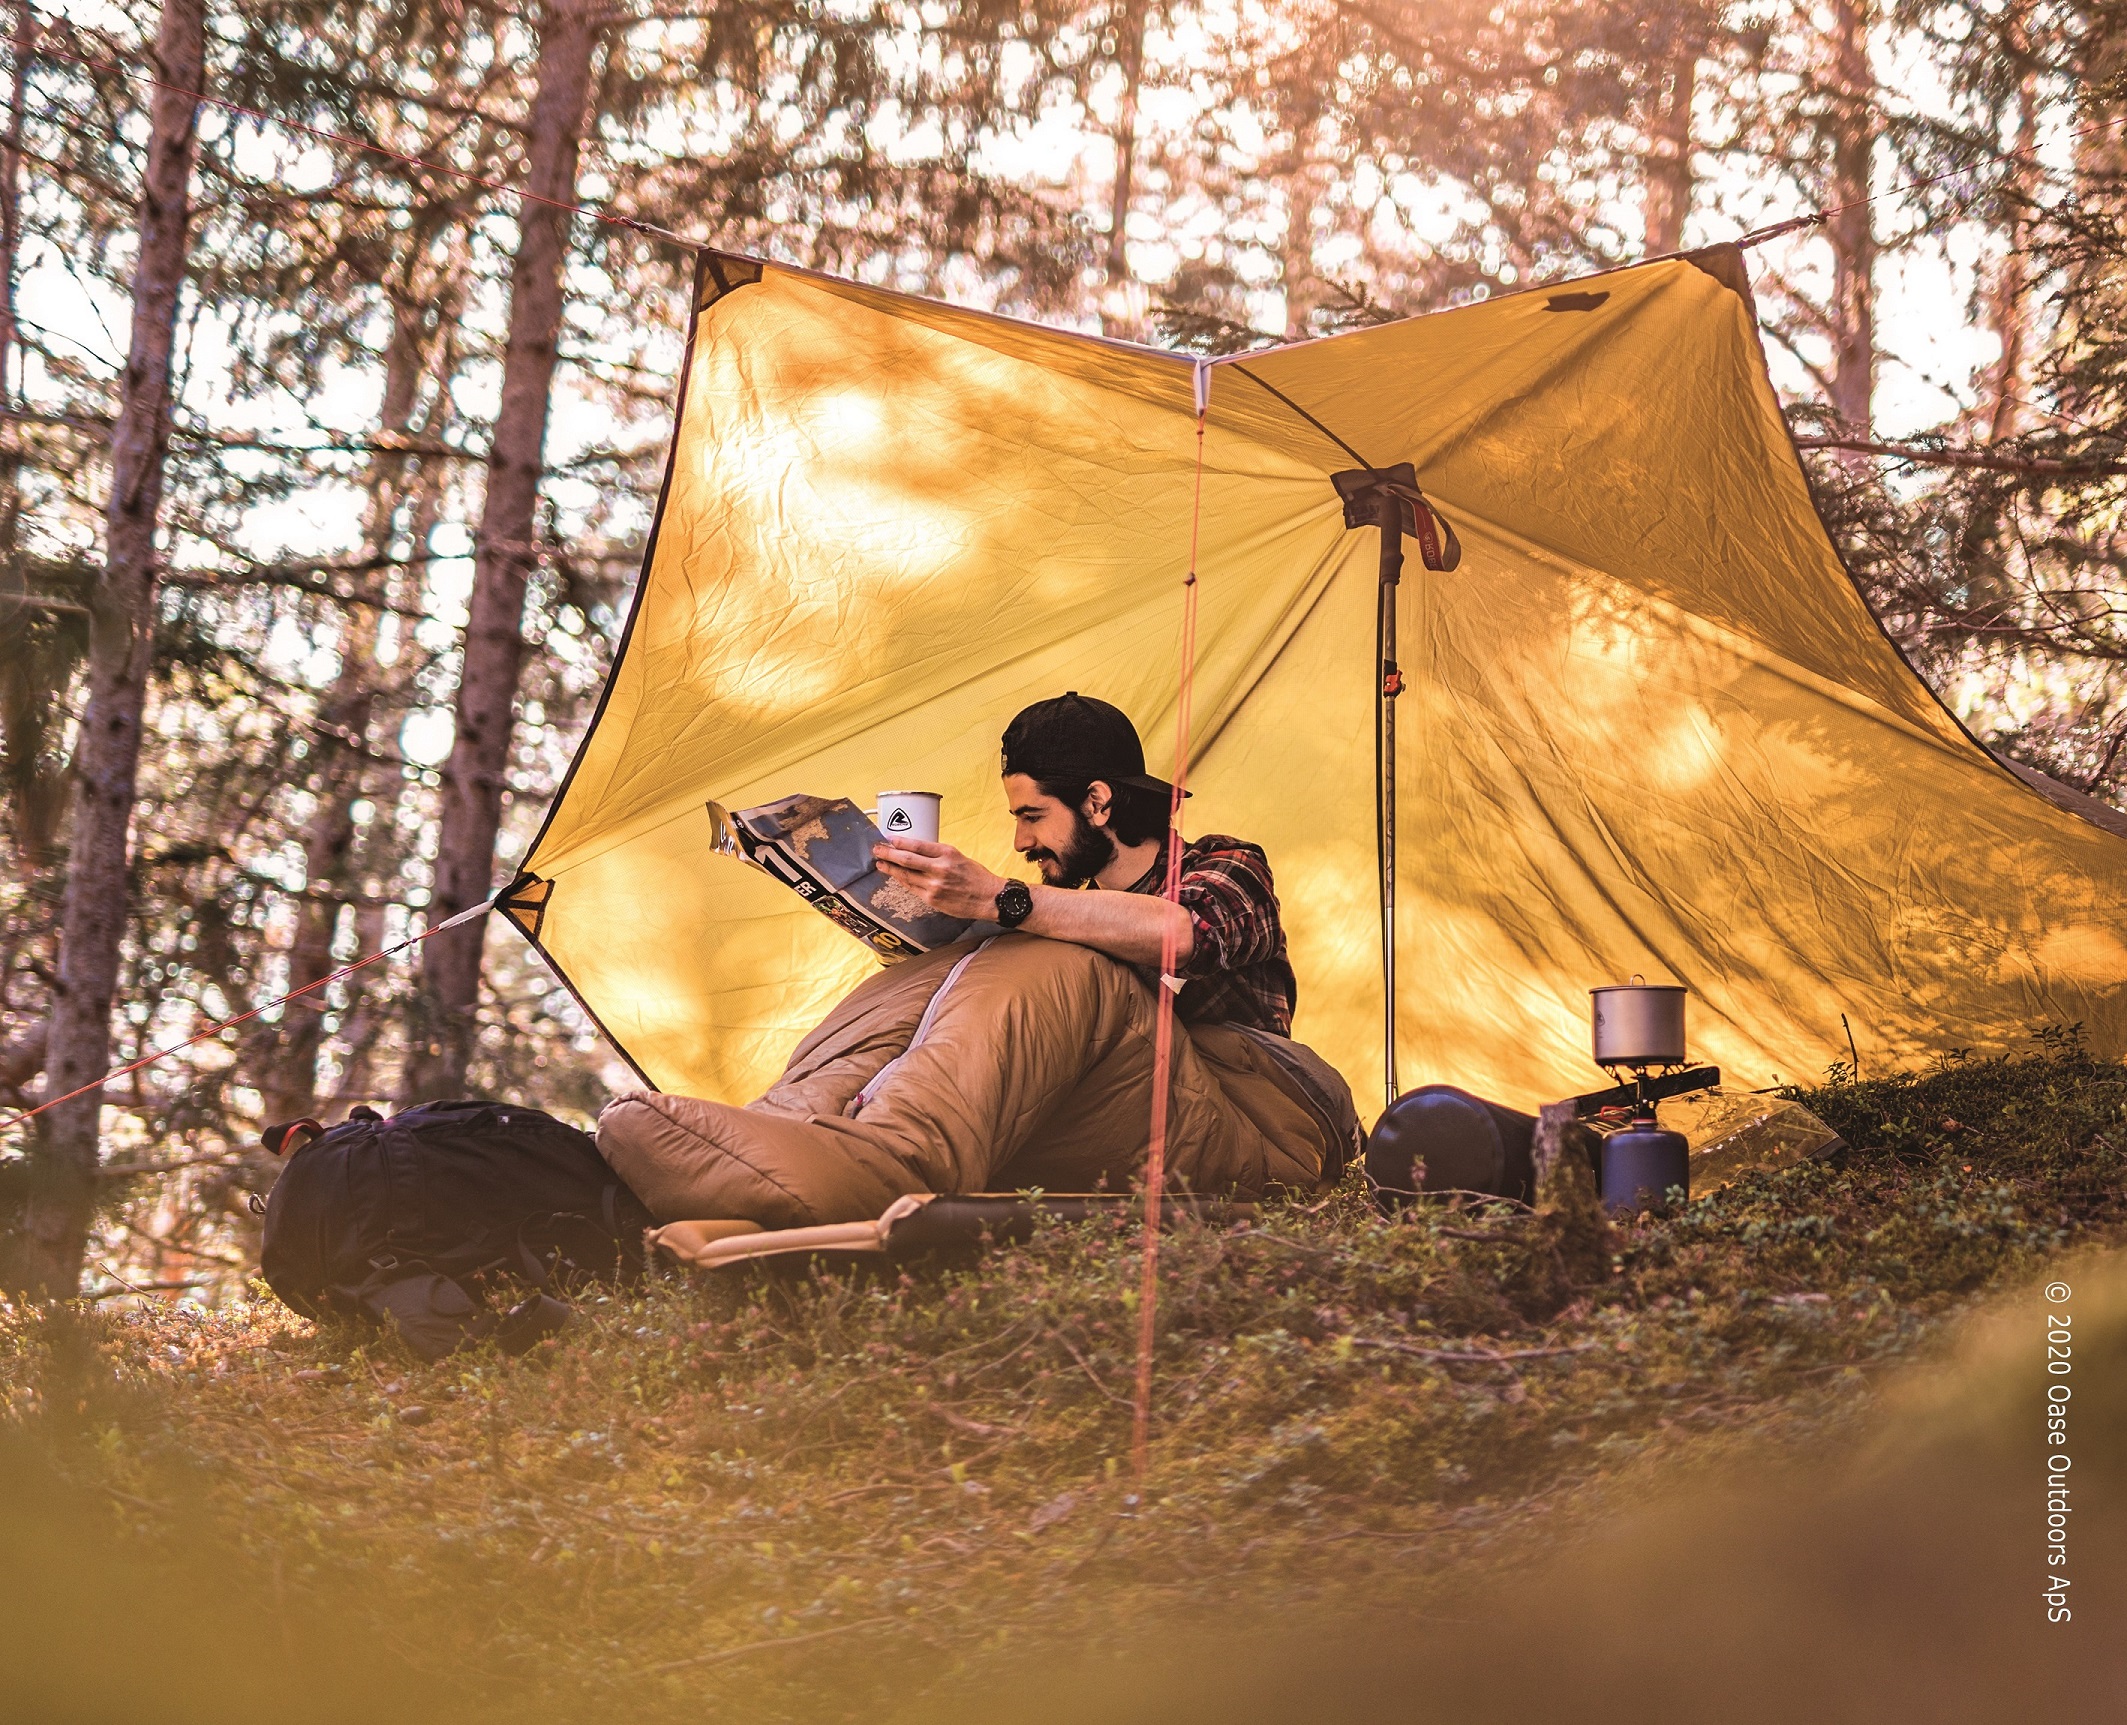
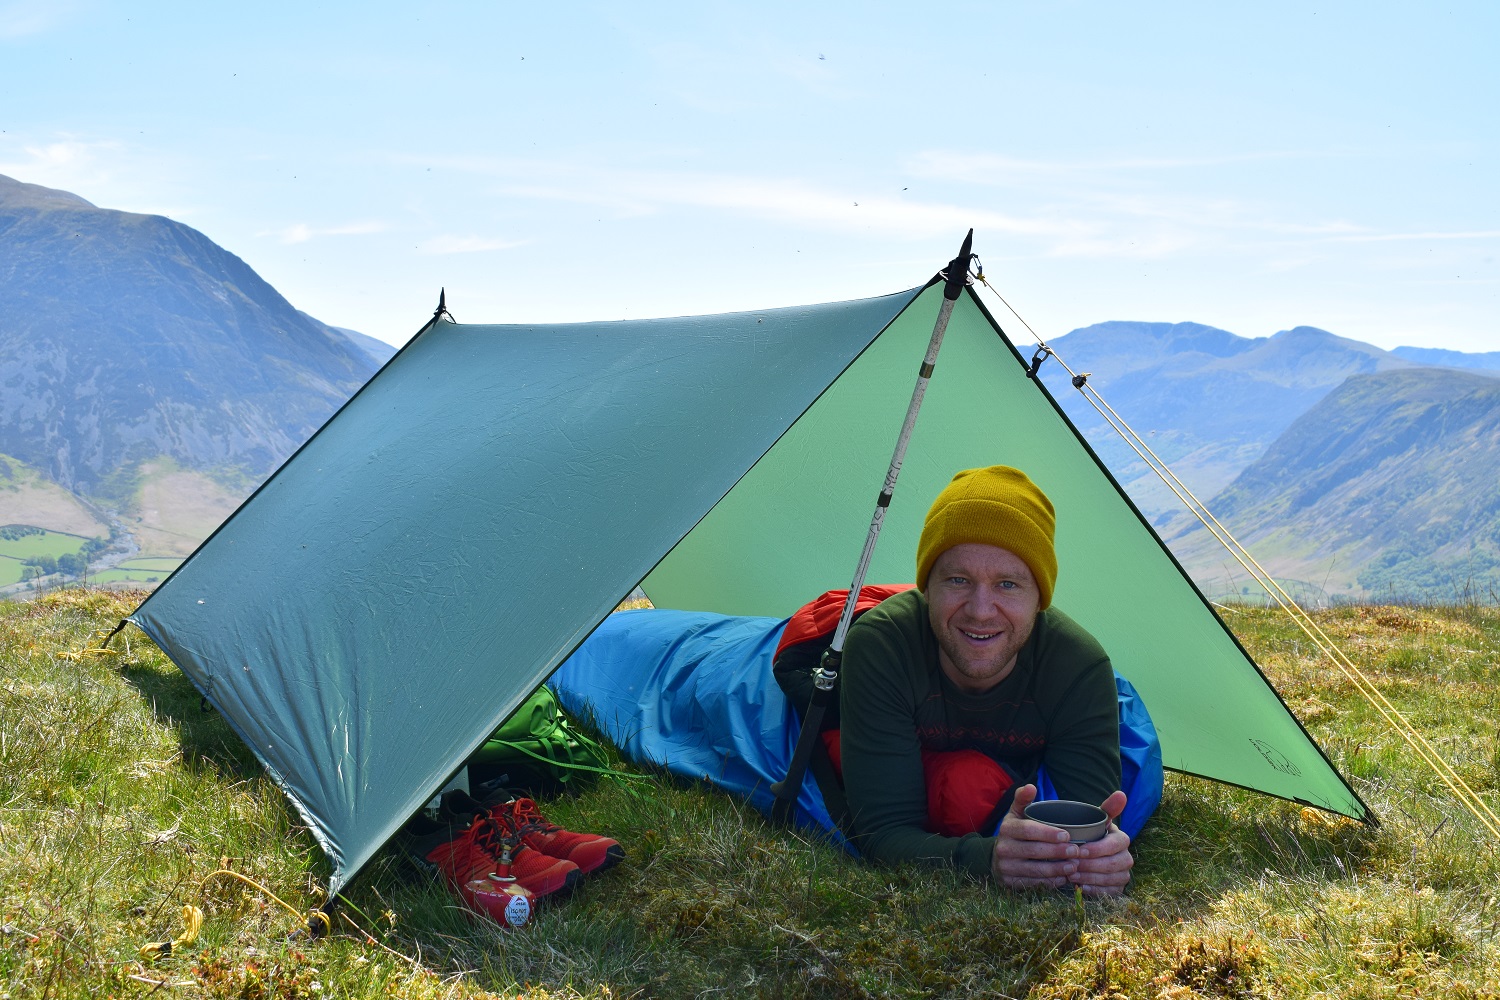
Well, the lure of sleeping in a tarp is three-fold. Firstly, while a tent can feel too enclosed and restrictive (a flappy four-walled coffin, if you like), a tarp is open and airy, leaving you gloriously at one with nature and the landscape. You’ll feel the fresh air on your face, and watch the stars twinkle above you. A bit like sleeping in a bivvy bag, many prefer this more intimate interaction with the mountains. Secondly, tarps are far more technical, weatherproof and versatile than many people realise, offering a myriad of pitching options depending on the weather and terrain. And thirdly, compared to ridiculously pricey modern tents, a good tarp doesn’t have to cost the earth. In fact, it will probably provide far better value for money, particularly if you are trying to become an ultra-light backpacker.

What is a Tarp?

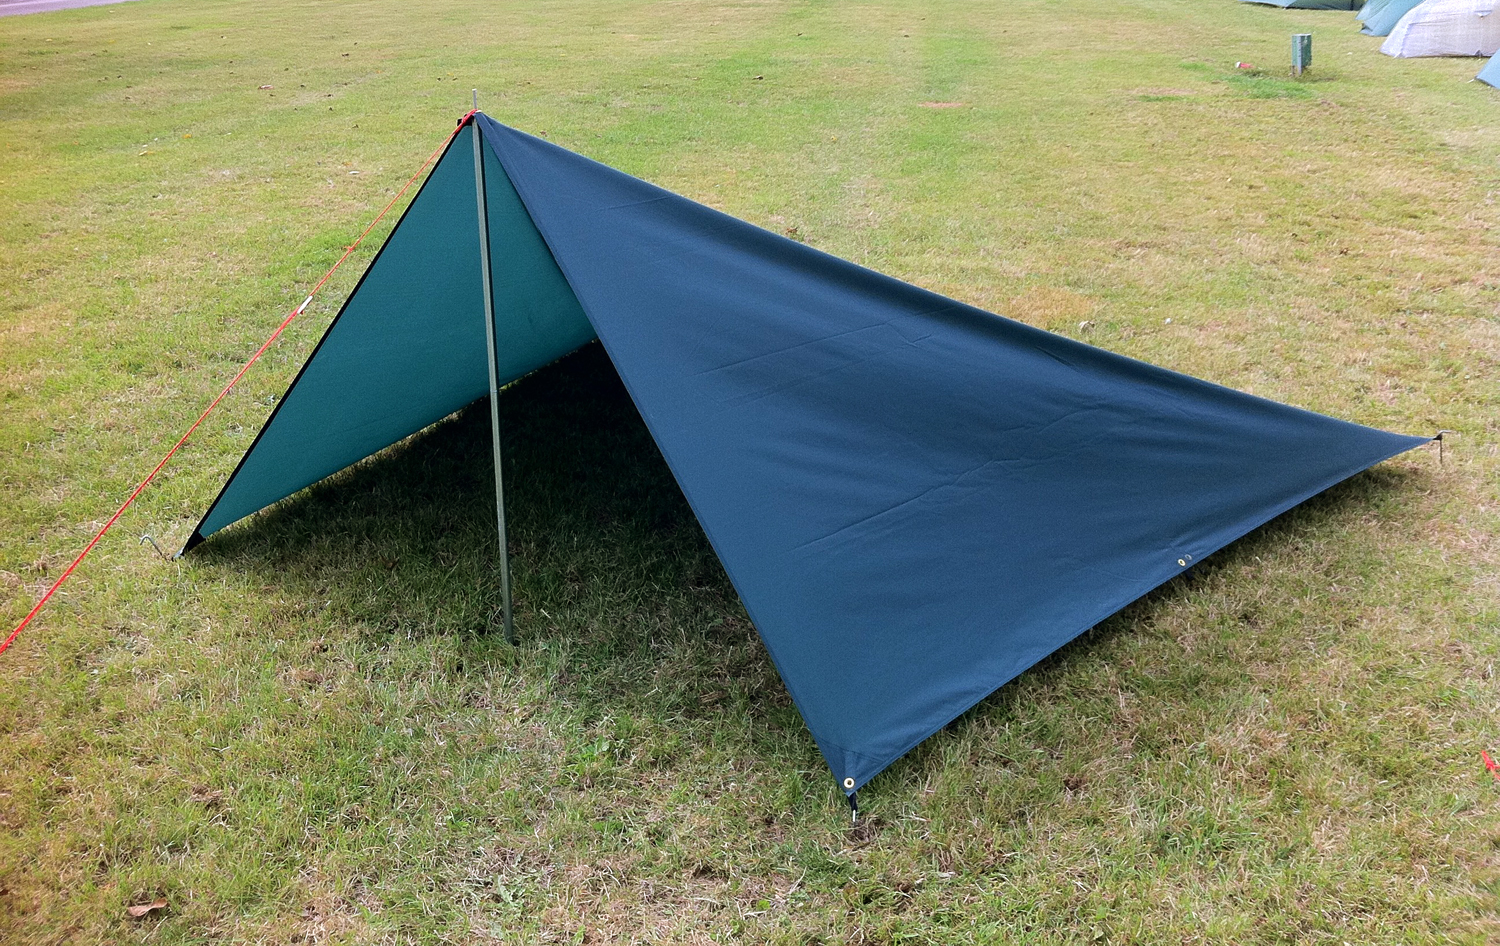
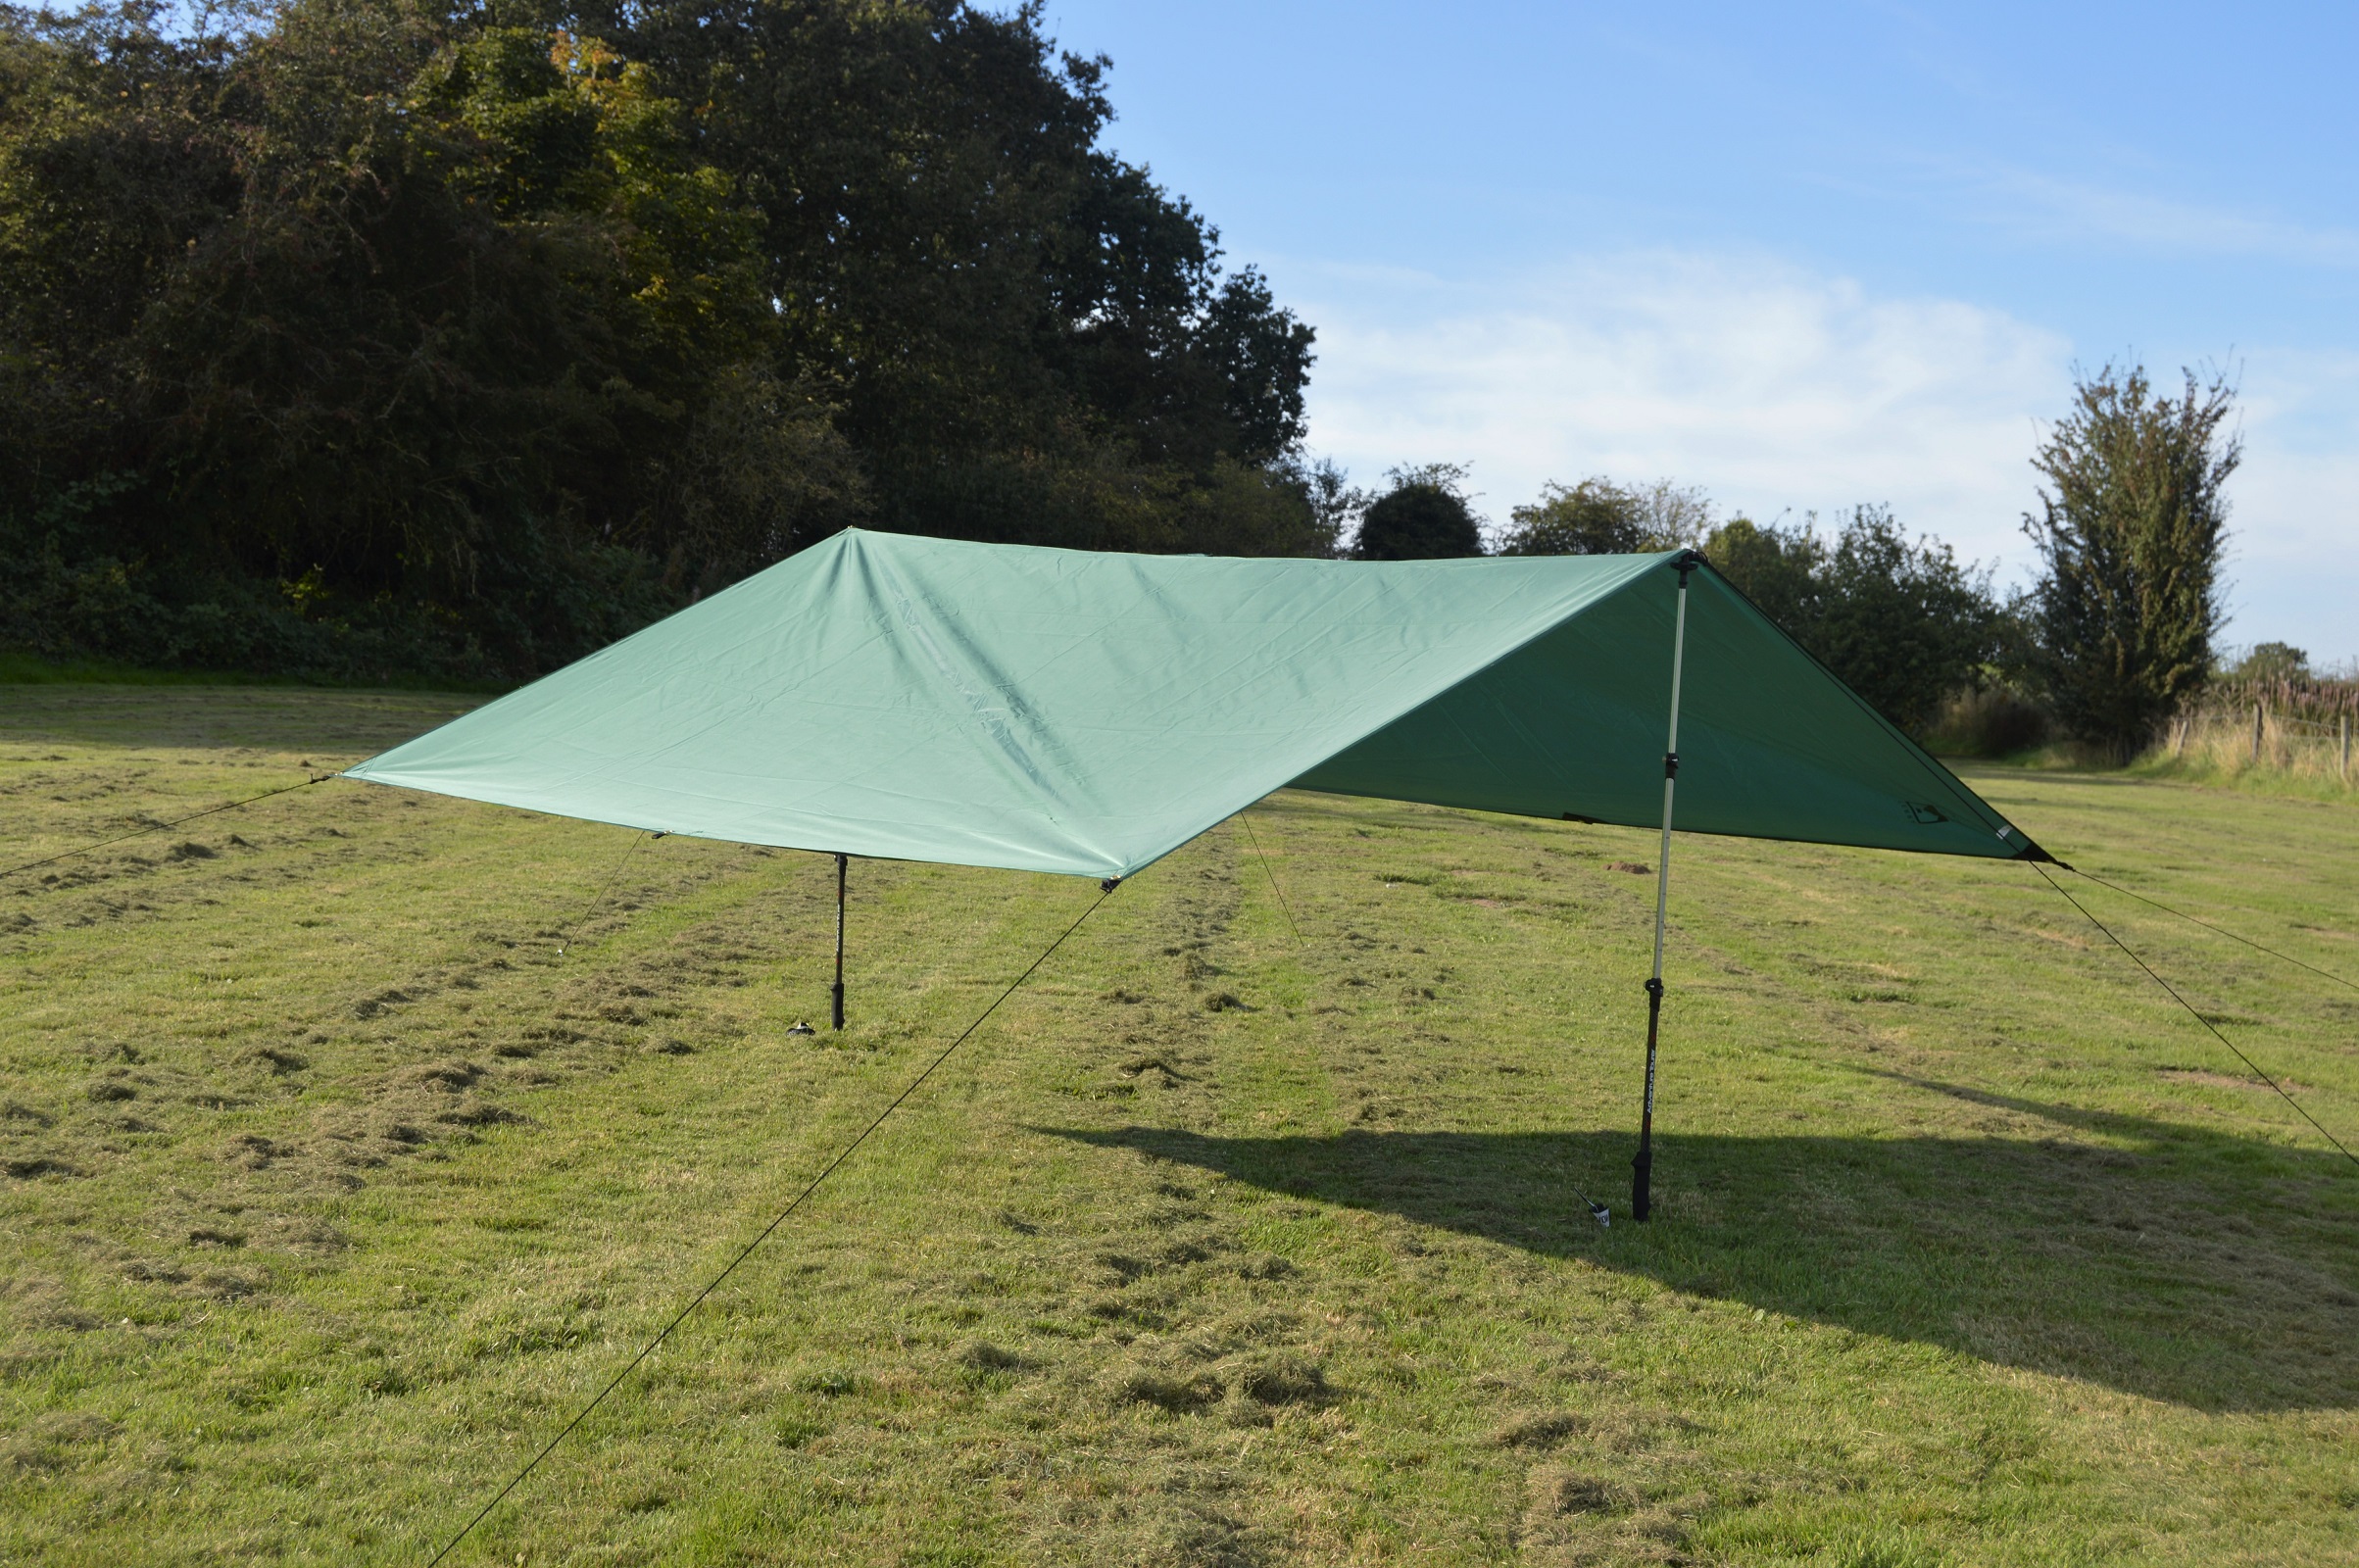
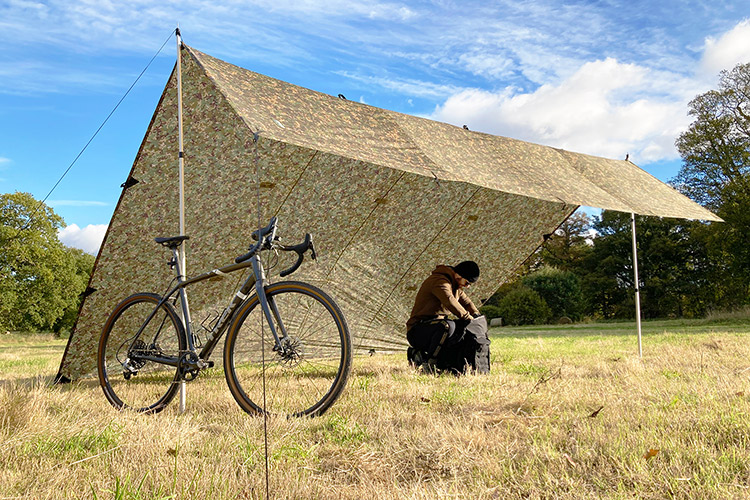
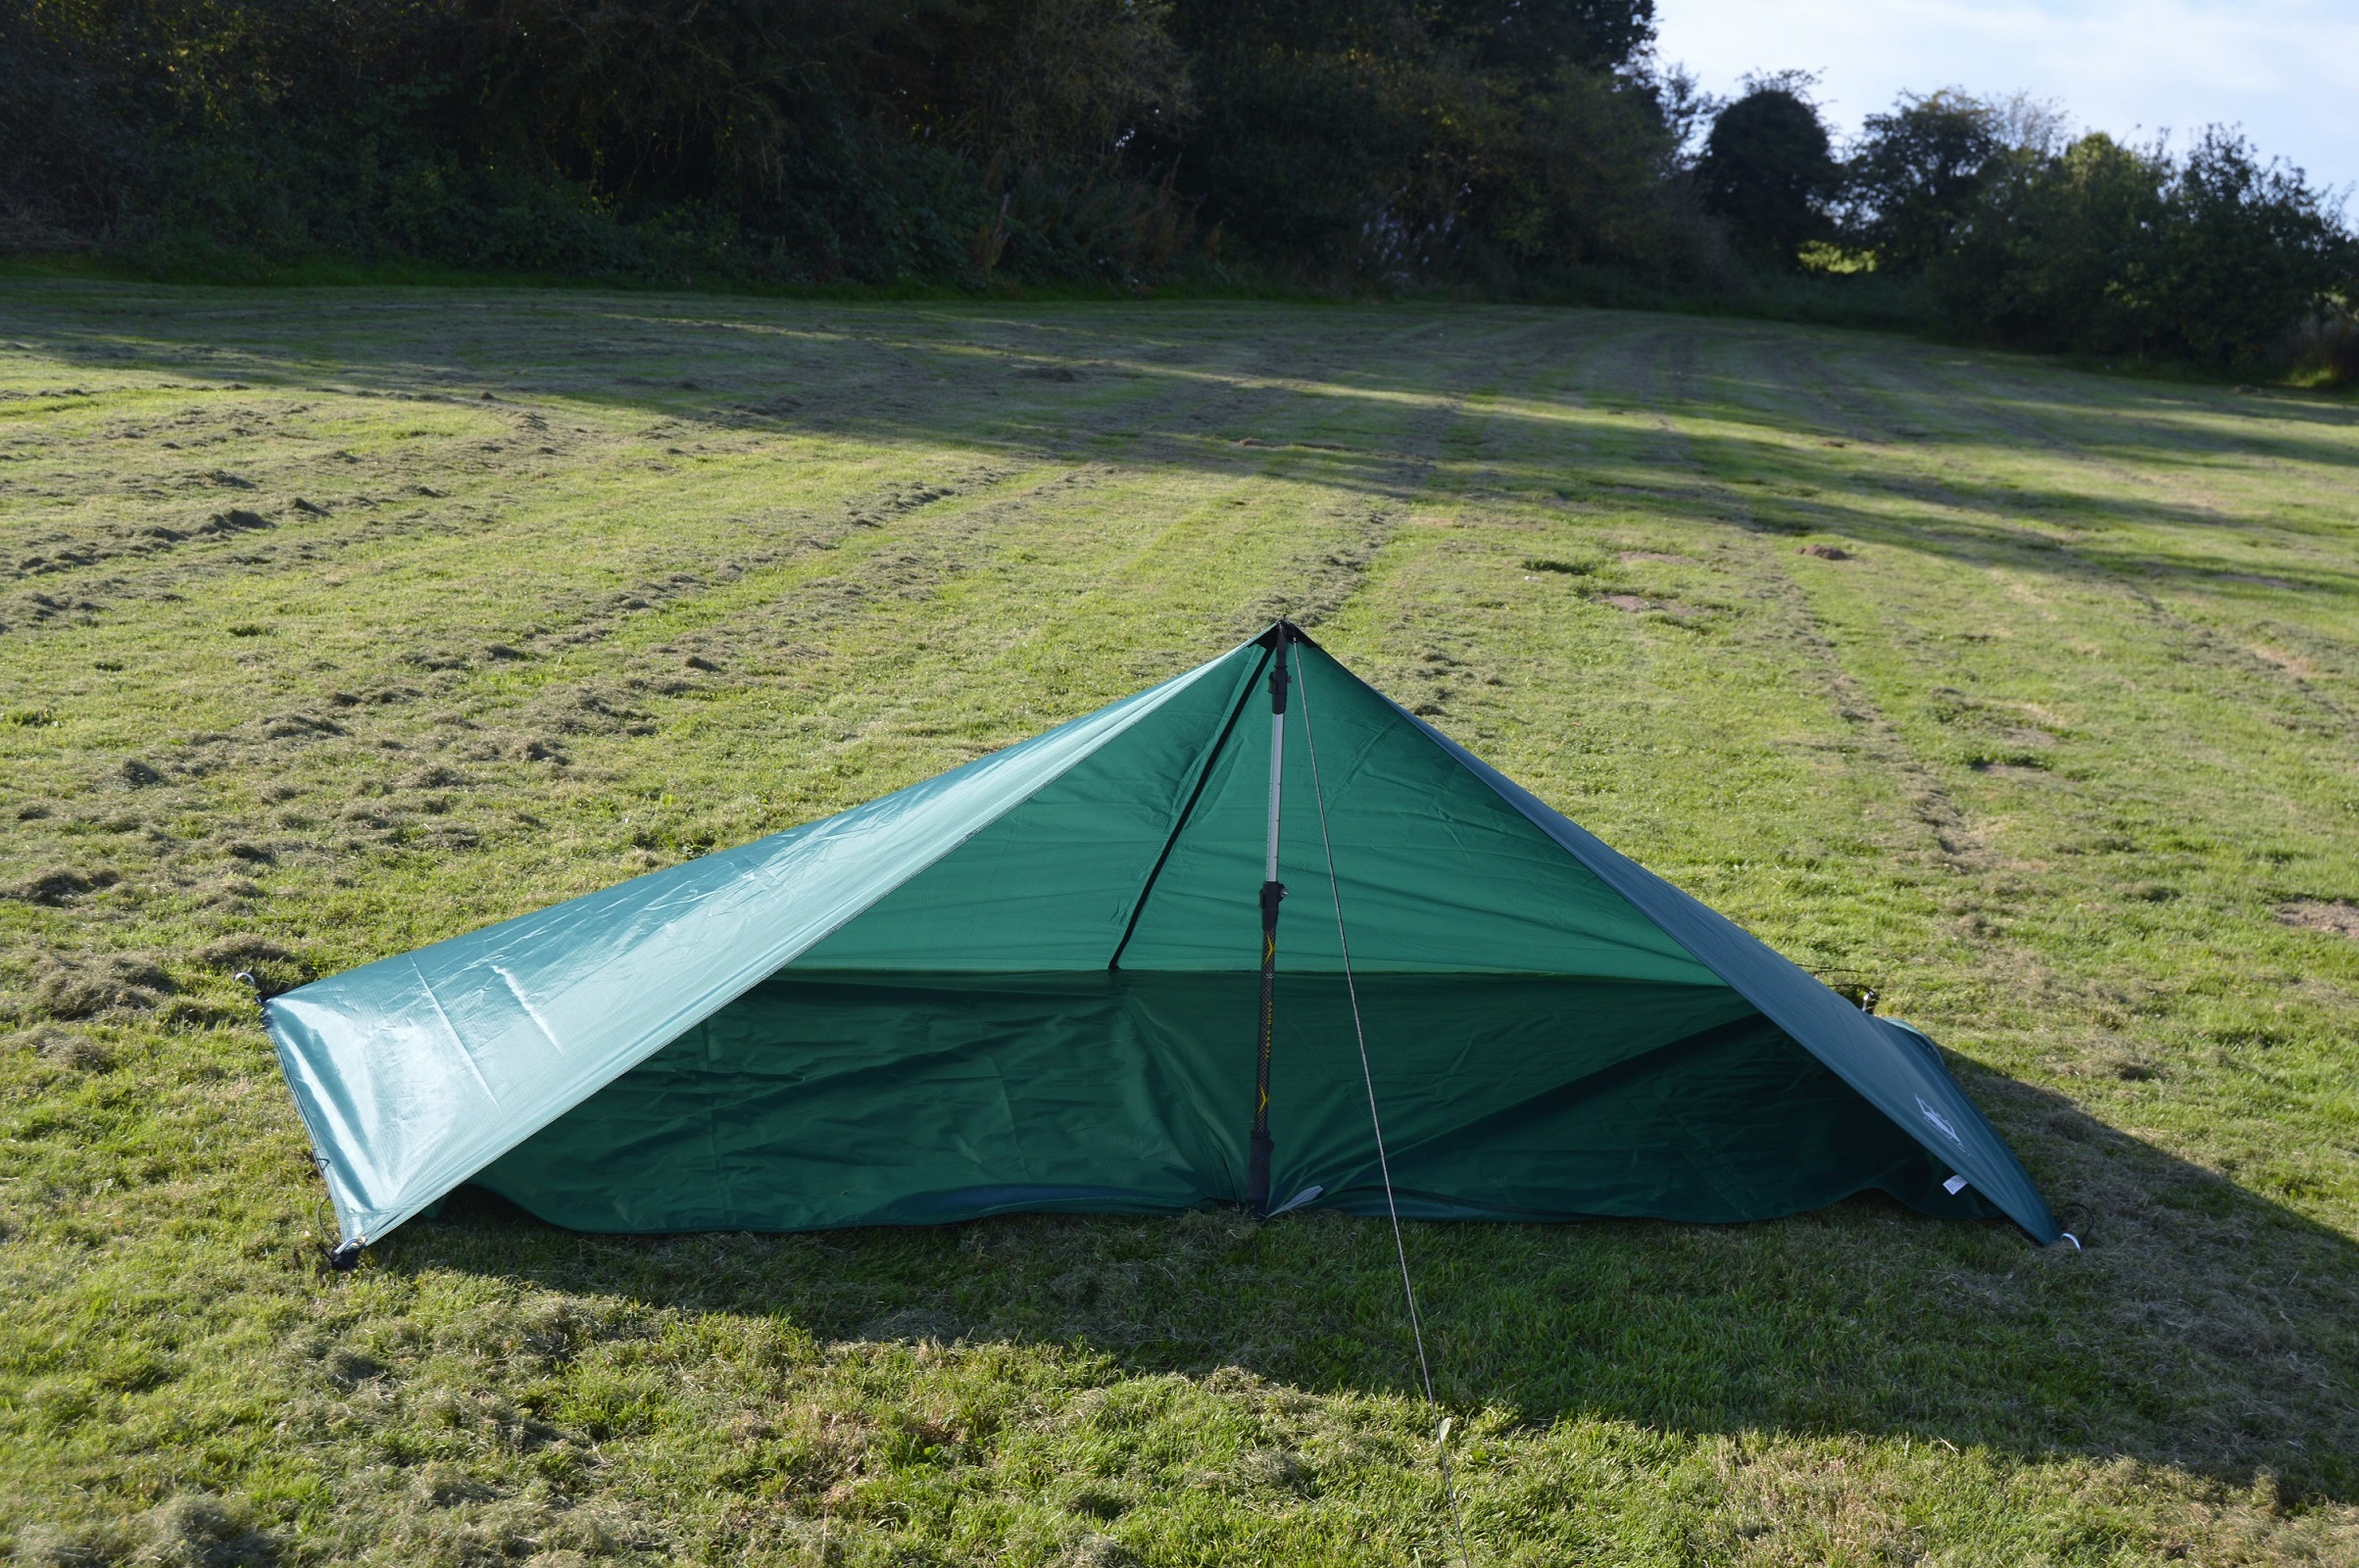
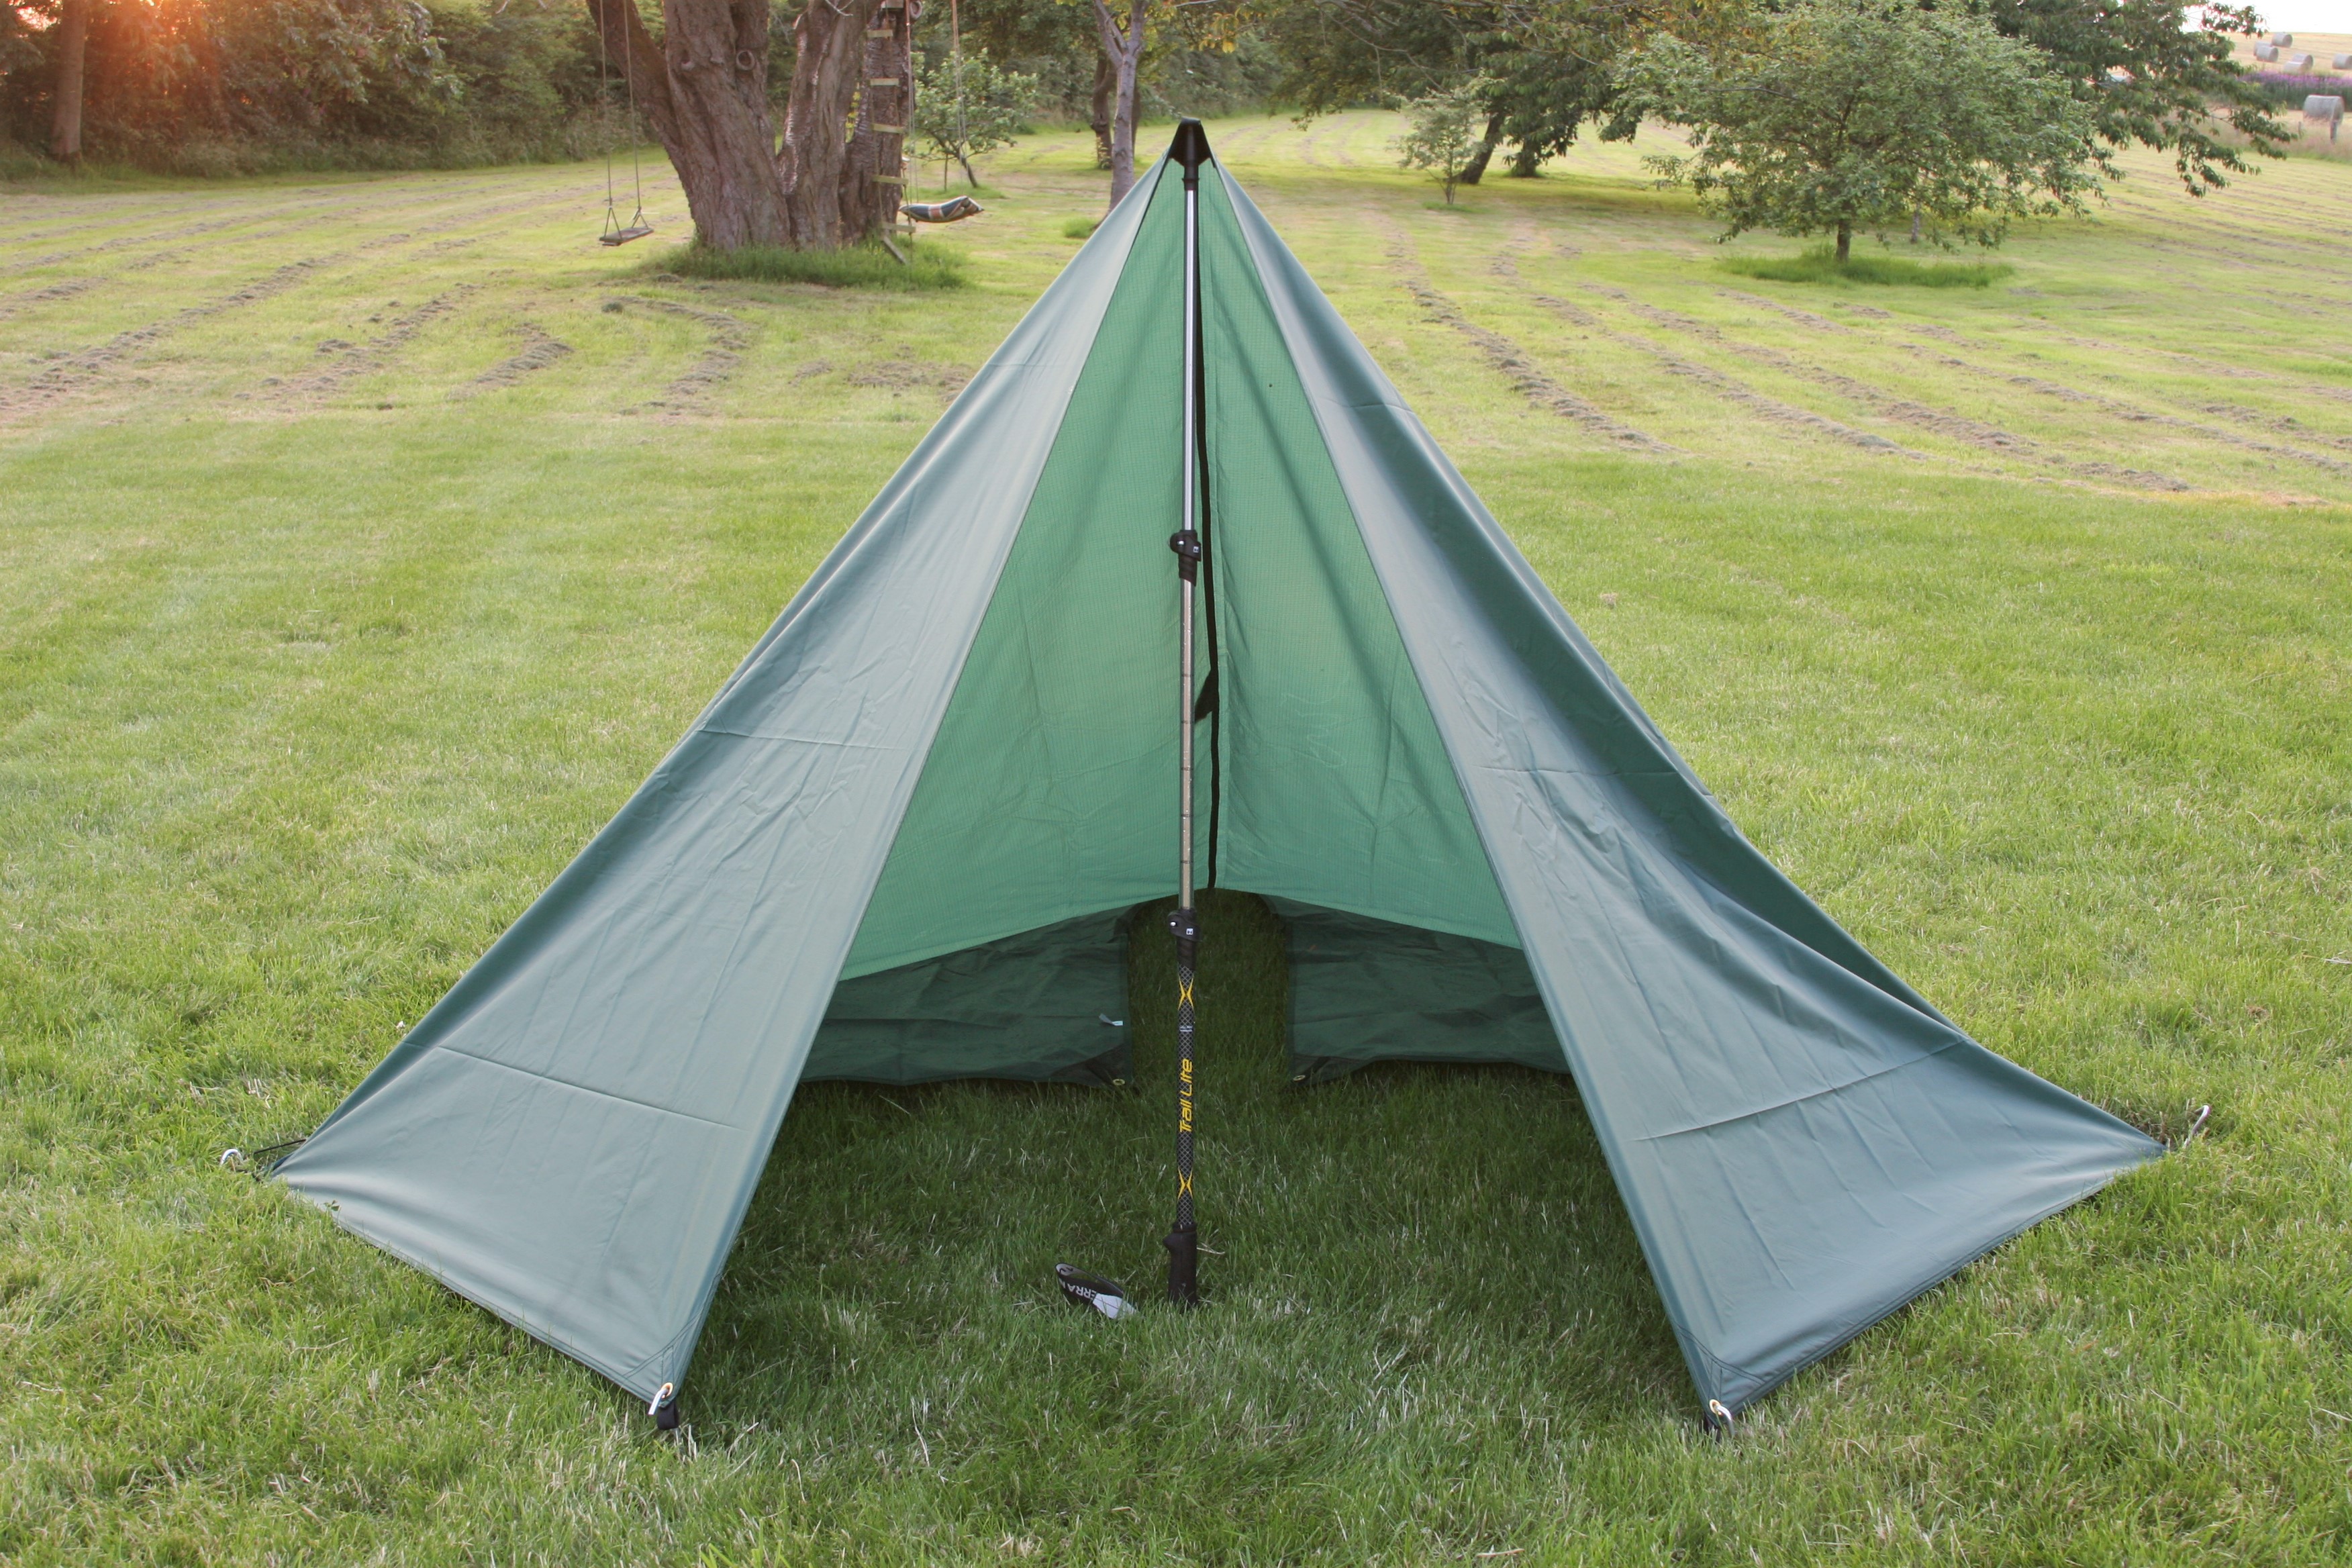
Essentially it’s a single-skin sheet of waterproof material used to create a bespoke shelter. It’s configurable in numerous shapes and layouts using pegs, guylines, walking poles and optional groundsheets or bug nets. This versatility allows modification to the weather: pitch high for space, ventilation and epic views in good conditions; pitch low for stability and protection during storms.

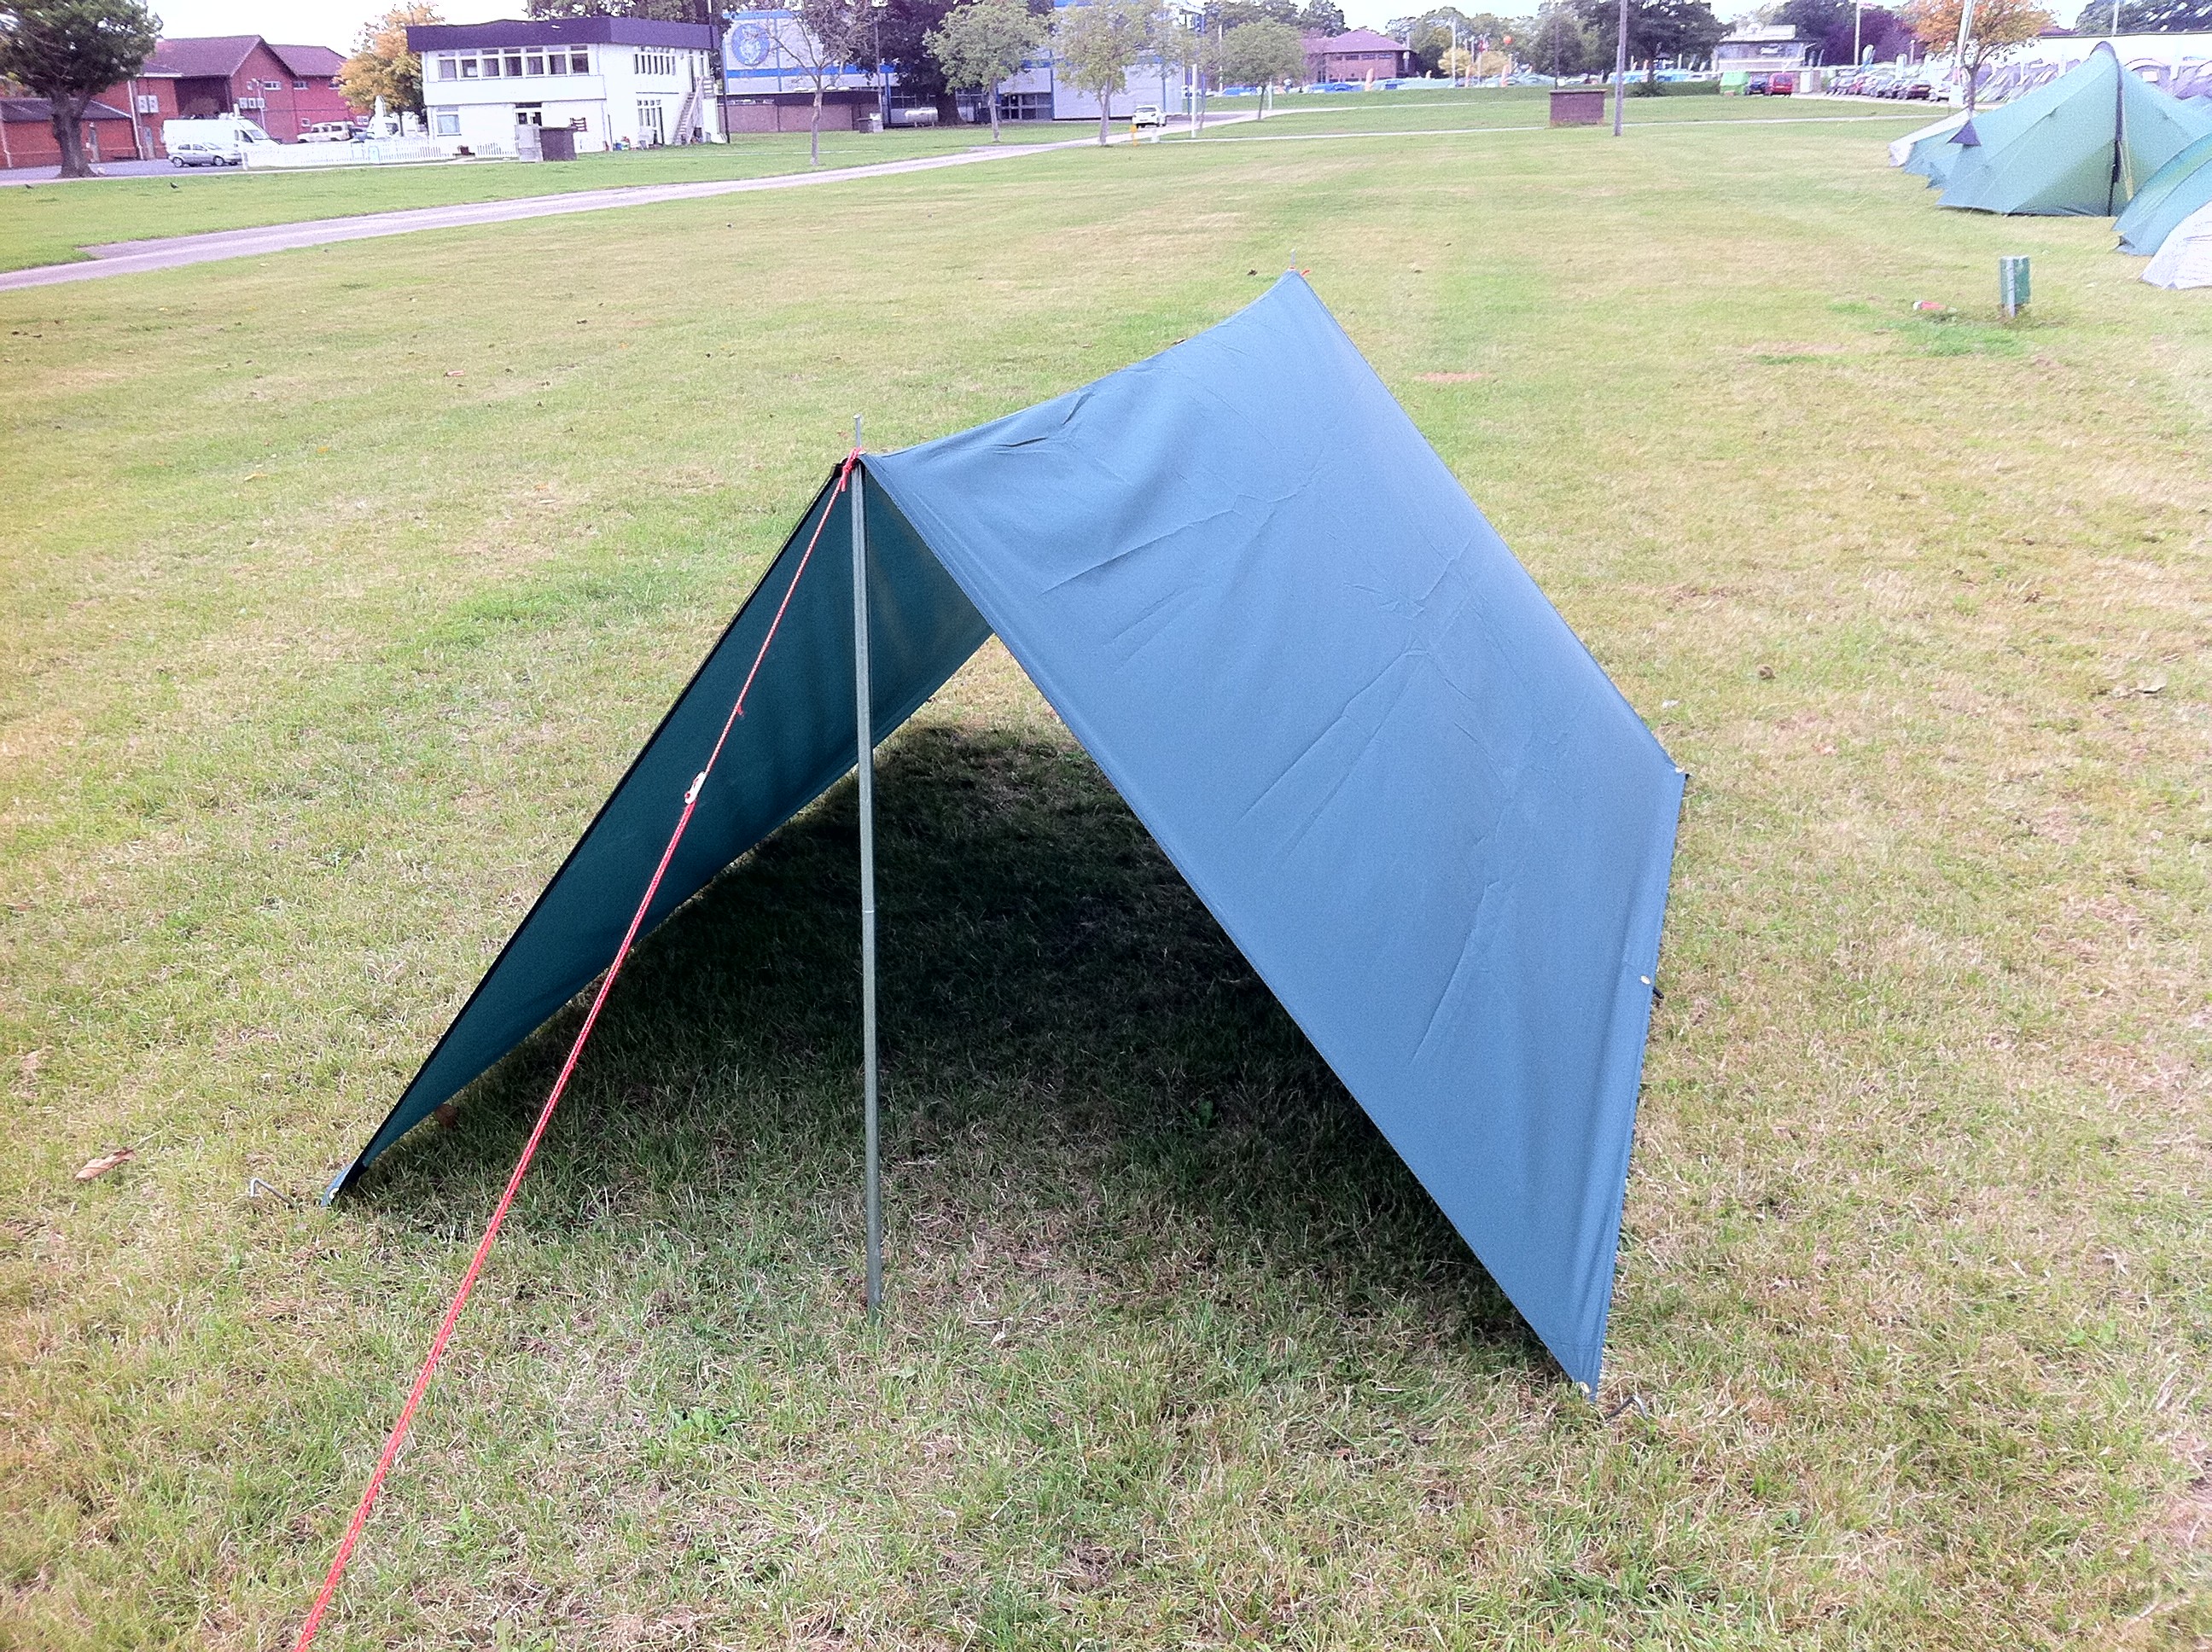
Choosing a tarp over a tent, therefore, won’t necessarily expose you to more wind and rain. With a little practice, you’ll quickly learn to pitch your tarp in a way that’ll protect you in the mountains, come rain or shine. The options are almost endless, from the simple A-Frame and Lean-To to the more complex Tipi or C Fly Wedge.

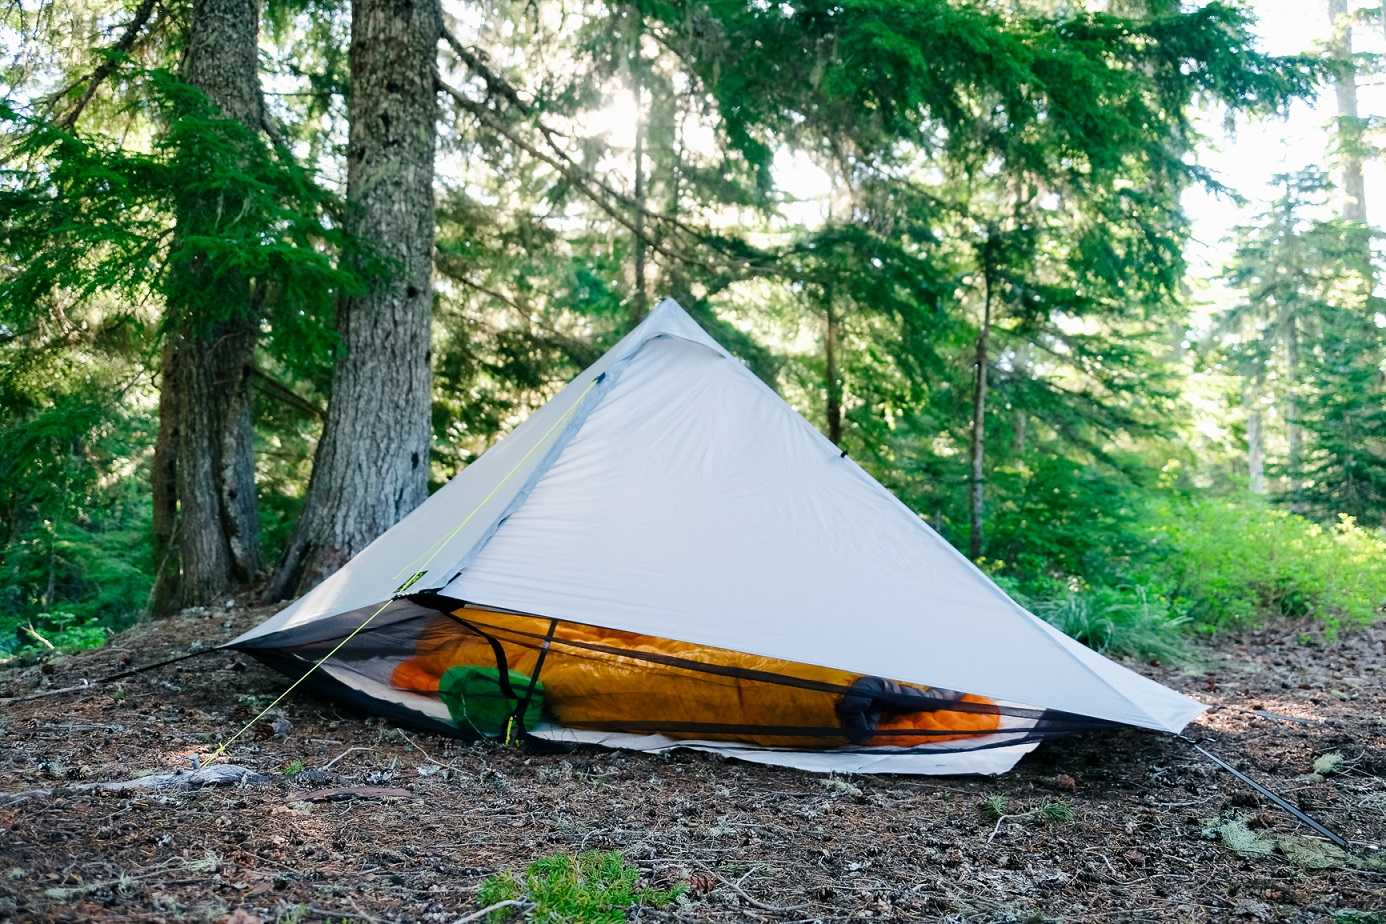
Tarp Types: Flat, Shaped or Tarp-tents

Tarps come in three main types: flat, shaped and tarp-tents. Flat tarps, which are square or rectangular, are the simplest option. Shaped tarps are multi-sided (i.e. heptagonal or hexagonal) or have curved edges, with the shape specifically designed by the manufacturers to enable clever and precise pitching. Tarp-tents, on the other hand, blur the line between tarp and tent, and can be pitched in different ways and often include advanced features such as zips or doors.

A shaped tarp - the Robens Wing
A flat tarp - the Nordisk Voss 5 ULW
A tarp-tent - the Six Moon Designs Deschutes Plus Solo Tarp

But knowing which is best for you can be a tad tricky. Flat tarps are great in forests where a ridgeline can be hung between trees, for example, and are ideal for beginners or for wild camping in the warmer, drier climes of spring and summer. They are the cheapest option too. Shaped tarps are best for a low-profile pitch, providing better protection from the rain and wind, but they are usually a lot more expensive. The cutouts in a shaped tarp, which mean it isn’t flush to the ground on all sides, may also improve ventilation and thus help prevent condensation. The advantage of tarp-tents, conversely, is that they can provide better headroom and protection from bugs, but there are downsides – a higher price, heftier weight and less versatility.

Buying A Tarp: Key Features To Look Out For

Weight: For a minimalist experience, go for the lightest tarp possible – and remember to count the weight of poles, pegs, guylines and bivvy too.

Size: For a solo tarp aim for about 2.5mx1.8m – you’ll get more versatility with a larger tarp, but it’ll weigh more.

Seams: Pick a tarp with sealed seams to ensure your shelter is waterproof – or apply the sealant yourself to prevent water ingress.

Attachment points: A good tarp will have eight or more attachment points for guylines and pegs, ensuring greater versatility and stability.

Prop points: Integrated grommets, which house a trekking pole’s tip, help improve the integrity and stability of a tarp.

Waterproofing: A tarp’s hydrostatic head rating will give a good indication of its waterproofing – aim for 3,000mm+ for rainy adventures.

Materials: Advanced waterproof materials are ultralight and thin, whereas thicker materials are more durable and cheaper, but heavier.

Extras: Additional features – such as integrated zips, doors, groundsheets or bug mesh inners – will provide enhanced functionality.

Four Ways To Set Up A Tarp

Before you throw the tarp into your backpack and start marching up the nearest hill, it’s important to do some initial planning and preparation. It’d be foolish to leave your first ever pitch of a tarp until you’re actually on a mountain or on the trail of your long-distance trek. Instead test run your tarp in the garden, for example, fine-tuning your set-up so it’s as taught, strong and as stable as possible. In particular, you’re likely to learn exactly how many pegs and guylines you need for an effective pitch (this may require modifications to the off-the-shelf product), as well as the type and height of trekking poles you need. Remember, Z-shaped poles – the type which collapse into thirds – are generally useless for tarps, so you’ll be better served by telescopic style poles instead.

Another important thing to consider is how you will protect your sleeping bag from moisture. Some campers use a bivvy to protect their sleeping bag from the wet ground; ultra-light aficionados might use a polycro groundsheet (basically a large, thin, waterproof sheet of plastic); or others will pitch their tarp so that part of it creates a groundsheet.

Once you’ve perfected your approach, you’re good to head for the hills and put your learning into practice. Before setting up, remember to choose your camping spot wisely. Pick a location that’s as flat, dry and sheltered as possible, and pitch so your entrance is facing away from the prevailing wind. The next decision is simply – what tarp orientation shall I go for? It can sometimes be tricky to decide – after all, there’s an almost endless number of methods – but here are four of the best (and most common) options:

A-Frame (with Poles)

This simple pitching technique involves pegging down both sides and using trekking poles and guylines to raise the other two ends into a roof. This creates a steep-walled, A-shaped shelter with twin openings. For a more airy setup, use guylines instead of pegs in the four corners to create a ‘Floating’ A-Frame; or for improved weatherproofing, ditch one pole and peg down the tarp’s rear to create a single-entranced ‘Closed’ A-Frame. Tend to hike without poles? All of these types of A-Frame tarp set ups can also be achieved with cord or guylines.

A-Frame tarp. Picture courtesy of Terra Nova Equipment.
Closed A-Frame tarp. Picture courtesy of Terra Nova Equipment.
Floating A-Frame. Picture courtesy of Terra Nova Equipment

Lean-To

A lean-to tarp with a curved lip. Photo: DD Tarp 5×5

The lean-to is a minimalist structure with an open shape. In its simplest form, it’s an angled rectangle with the tarp’s rear pegged down and the front raised using trekking poles. A more advanced version is two-sided, with a rear wall and lipped canopy created with poles and tensioned guylines, as pictured above. But perhaps the best option is the C Fly Wedge, which resembles the basic lean-to (with lipped canopy), but with an extra pegged-out fold at the bottom forming a groundsheet.

Side-V

Side-V tarp with one central pole. Picture courtesy of Terra Nova Equipment.

This basic shelter is shaped like a V on its side, with a makeshift groundsheet and sloping roof/wall. The roof blocks the prevailing wind, but both the sides and front are open to the elements. Pitching the side-v is simple: stake out a rectangular groundsheet, and use two poles and accompanying guylines to create the angled roof. A common variation is to use only one pole centrally and peg down the sides, forming a tent-like structure with groundsheet and single opening.

Tipi

Tipi tarp. Picture courtesy of Terra Nova Equipment

This trickier setup uses one pole and guyline centrally to create a wigwam-shaped shelter with good headroom and a triangular opening. All other rig points are pegged down. Secure your pole in the tarp’s middle, if possible, for a wraparound-style, or attach it to the tarp edge for an airier structure.

You May Also Like:

An Expert’s Guide to Hot Tenting

How To Make A Fire Using a Bow Drill

How To Leave No Trace


Newsletter Terms & Conditions

Please enter your email so we can keep you updated with news, features and the latest offers. If you are not interested you can unsubscribe at any time. We will never sell your data and you'll only get messages from us and our partners whose products and services we think you'll enjoy.

Read our full Privacy Policy as well as Terms & Conditions.

production