Love wild camping and the reconnection to the nature that it brings? Well, have you ever thought about taking things a step further? Bivying is good for that, but what’s even better is building your own shelter with your own two hands. That’s how you really get back to basics.
The chances are you’re only ever going to build a shelter for the fun of it, but you never really know what’s around the corner, so it can’t hurt to know how to build a solid one you can rely on if the going ever gets tough. It could save your life one day, as they always say.
“Not many people get to say that they build their bedroom for the night”
As part of our recent collaboration with leading outfitter and manufacturer, Filson, we’re highlighting some of the old ways and crafts that bring us back to basics. In Part One, we looked at how to create a fire using a bow drill. Here in Part Two, with the help bushcraft expert, Thom Hunt, we look at how to build a lean-to shelter….
Here are some of the key tips to remember from Thom…
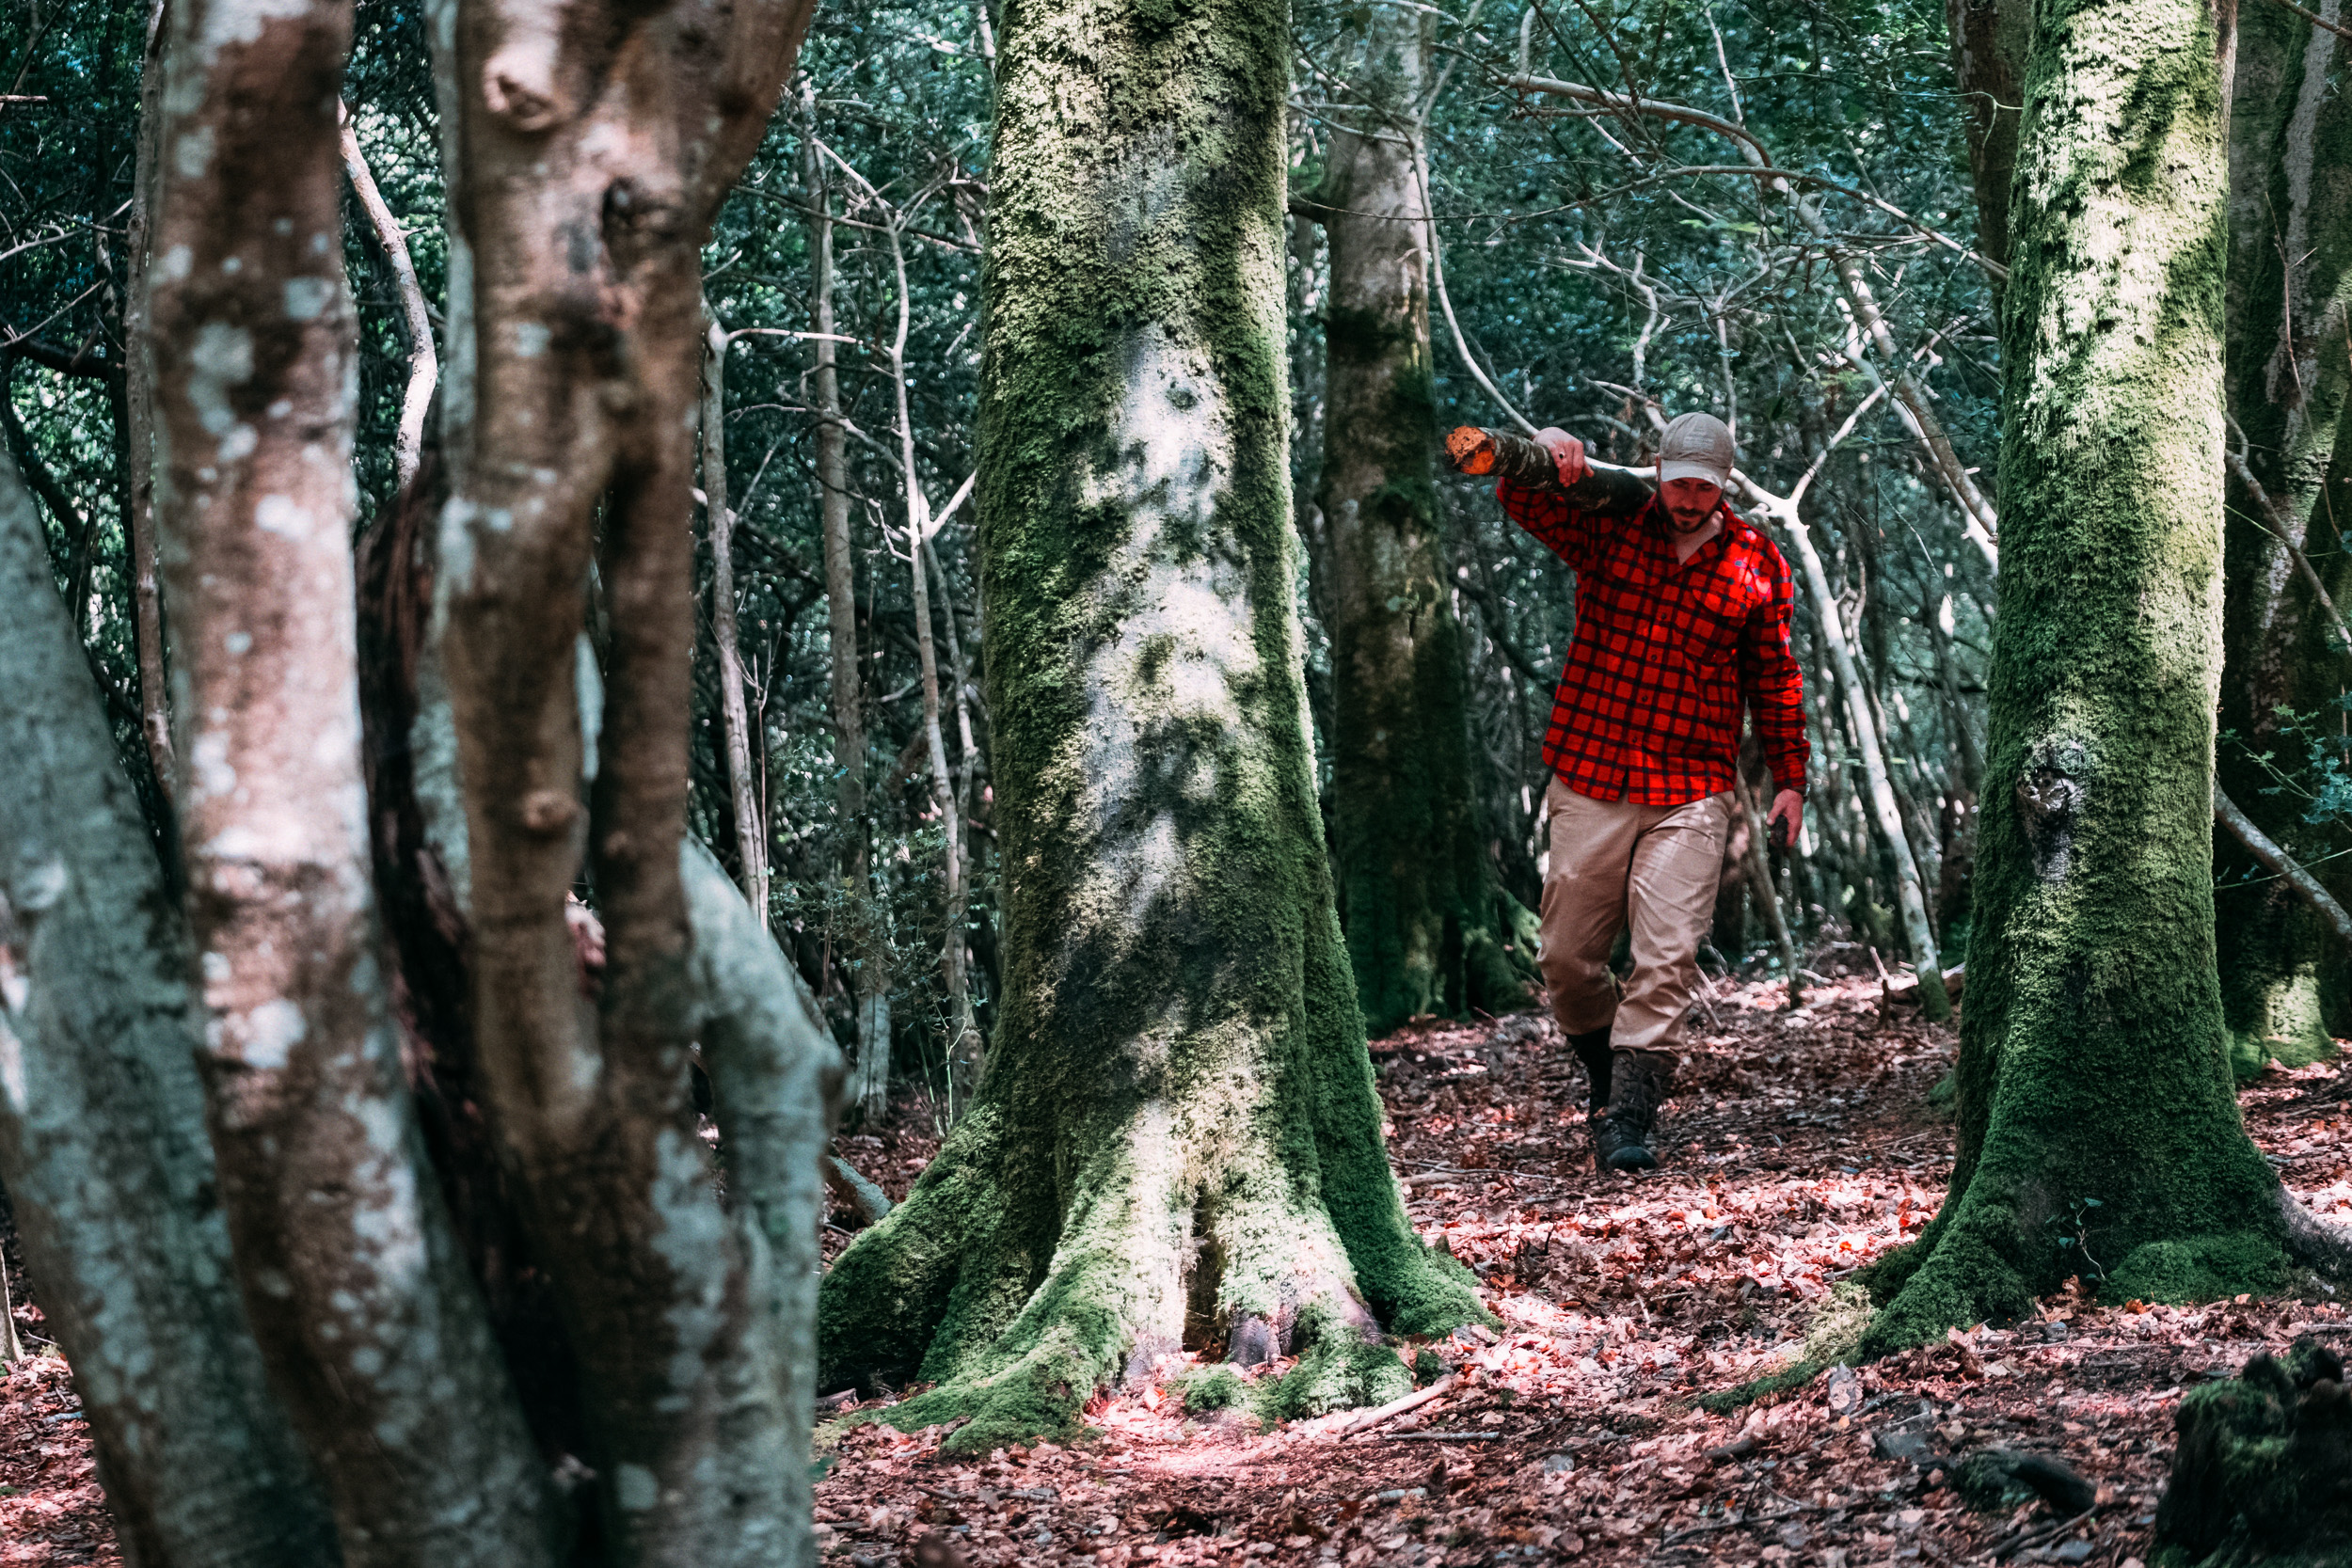
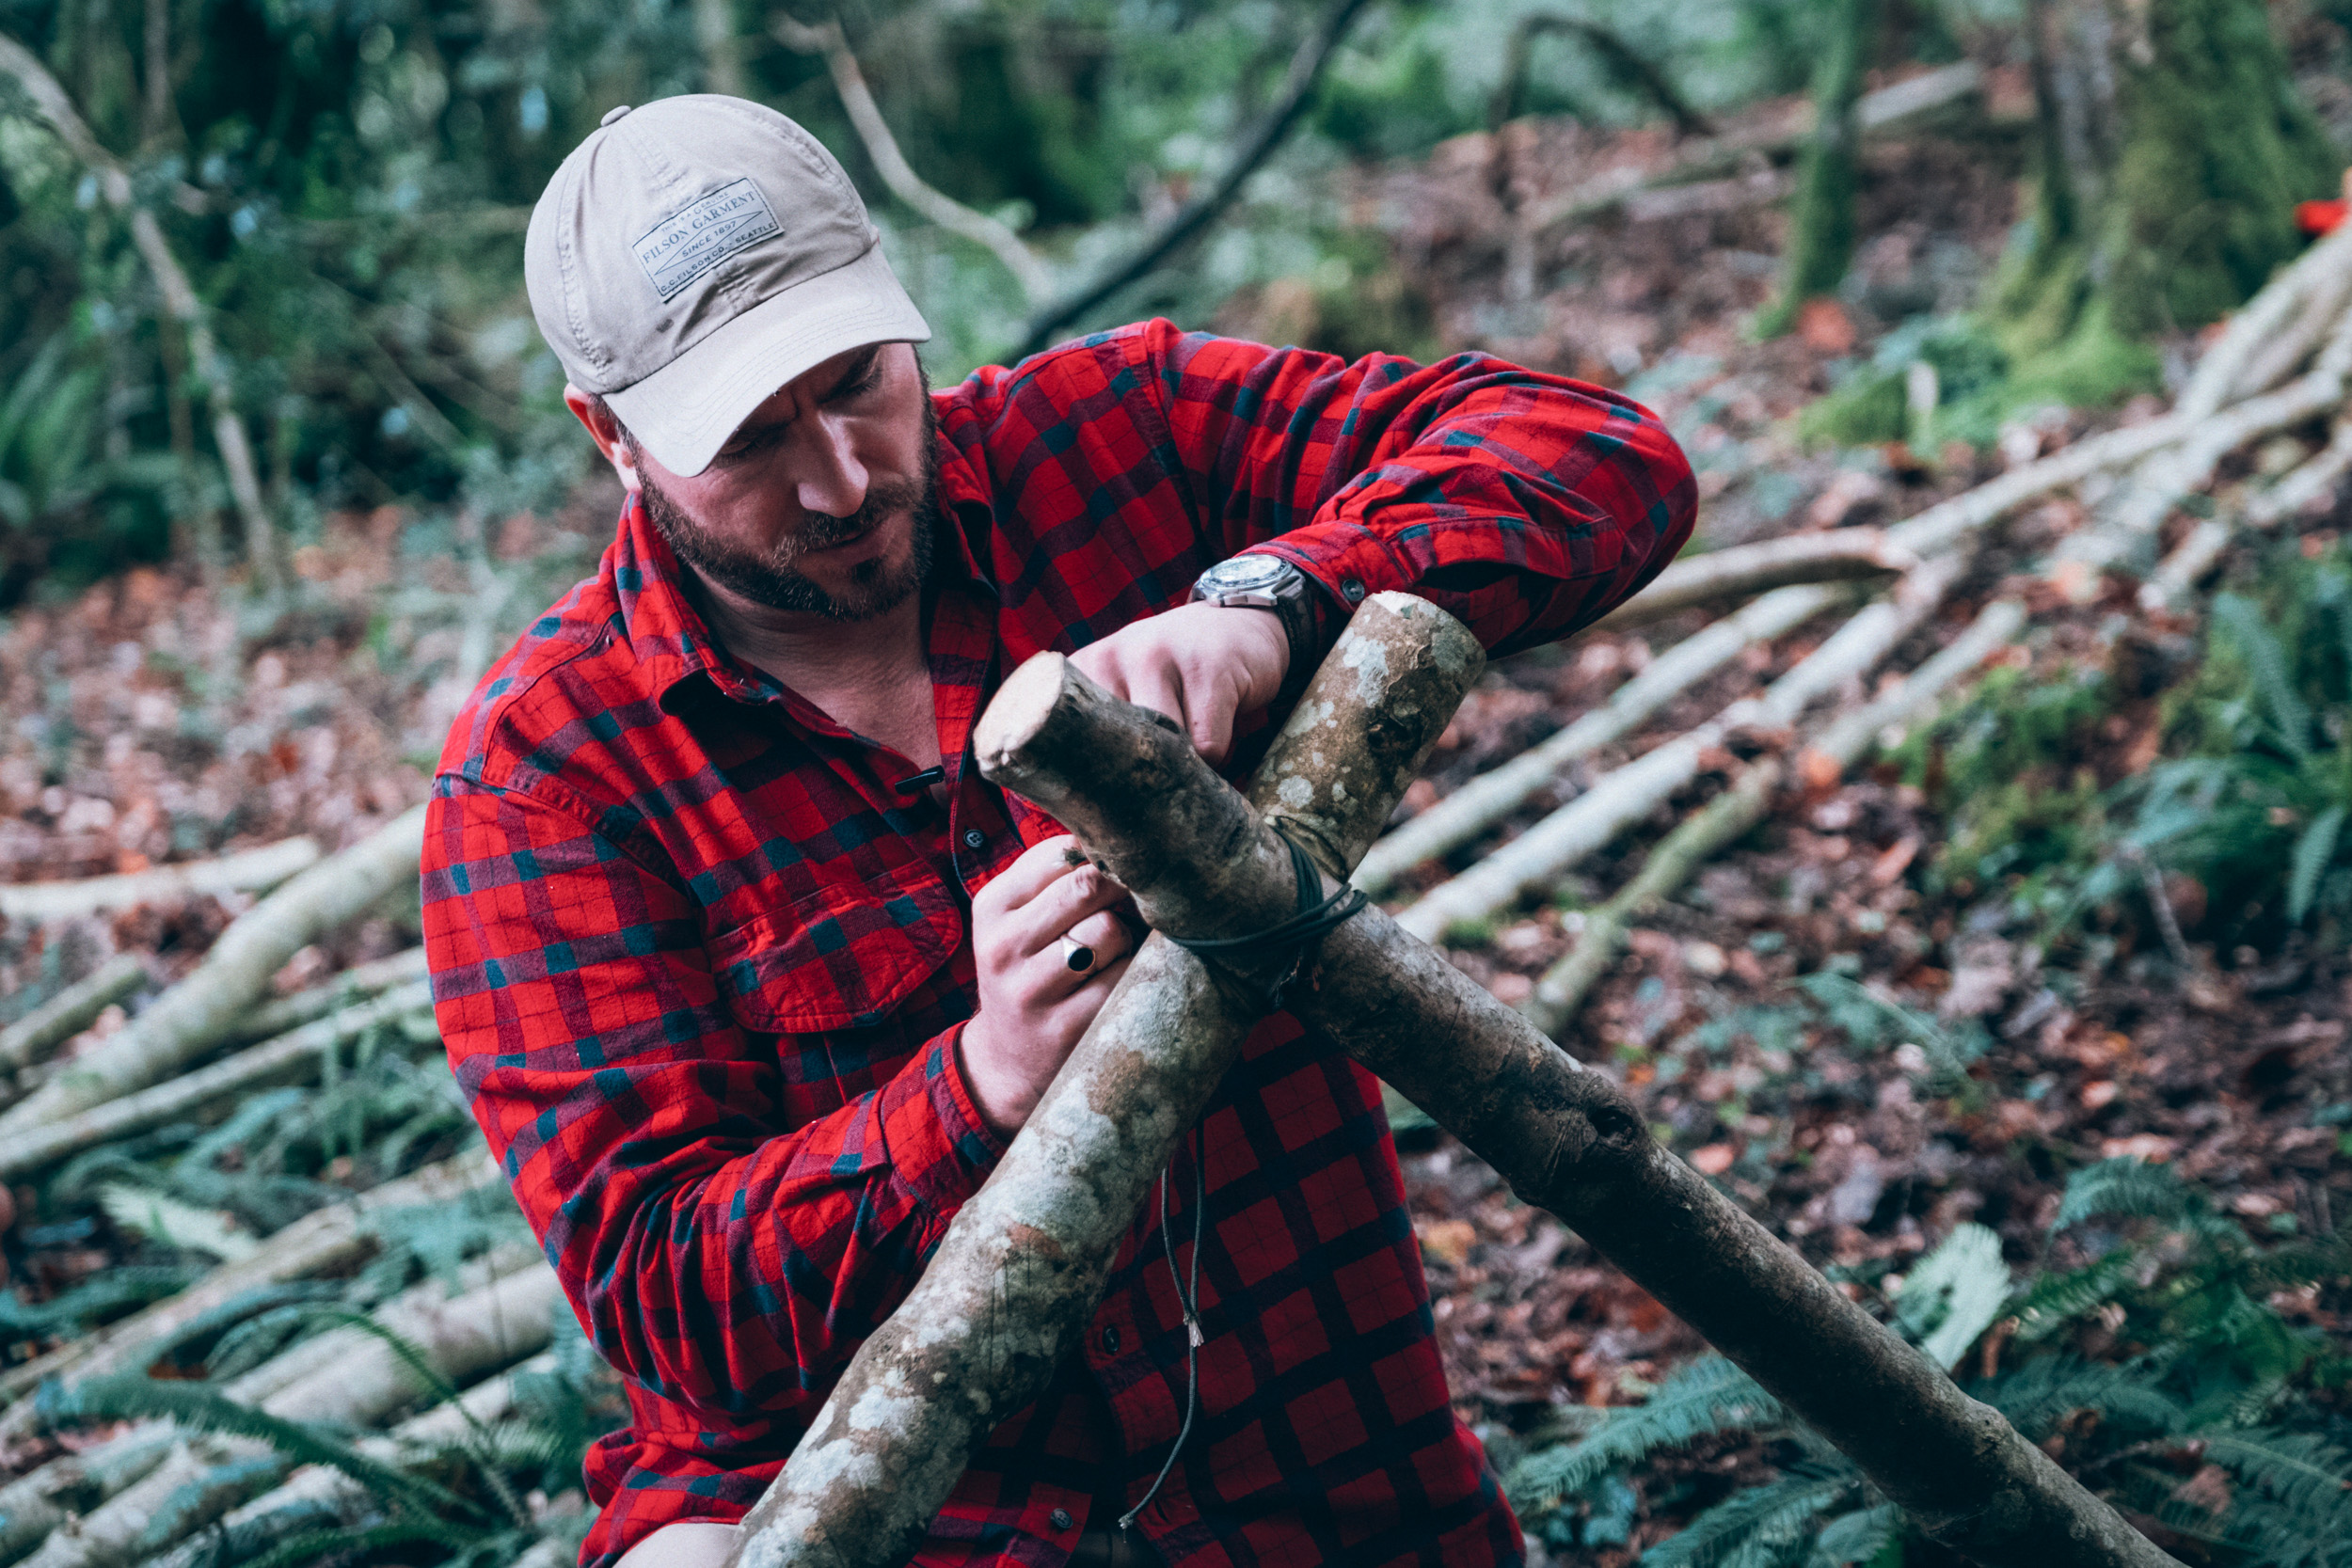
Make a site assessment before getting anywhere near the beginning of the build. Look for cover above and around you and water sources nearby but make sure to avoid insect nests and the risk of deadfall from above.
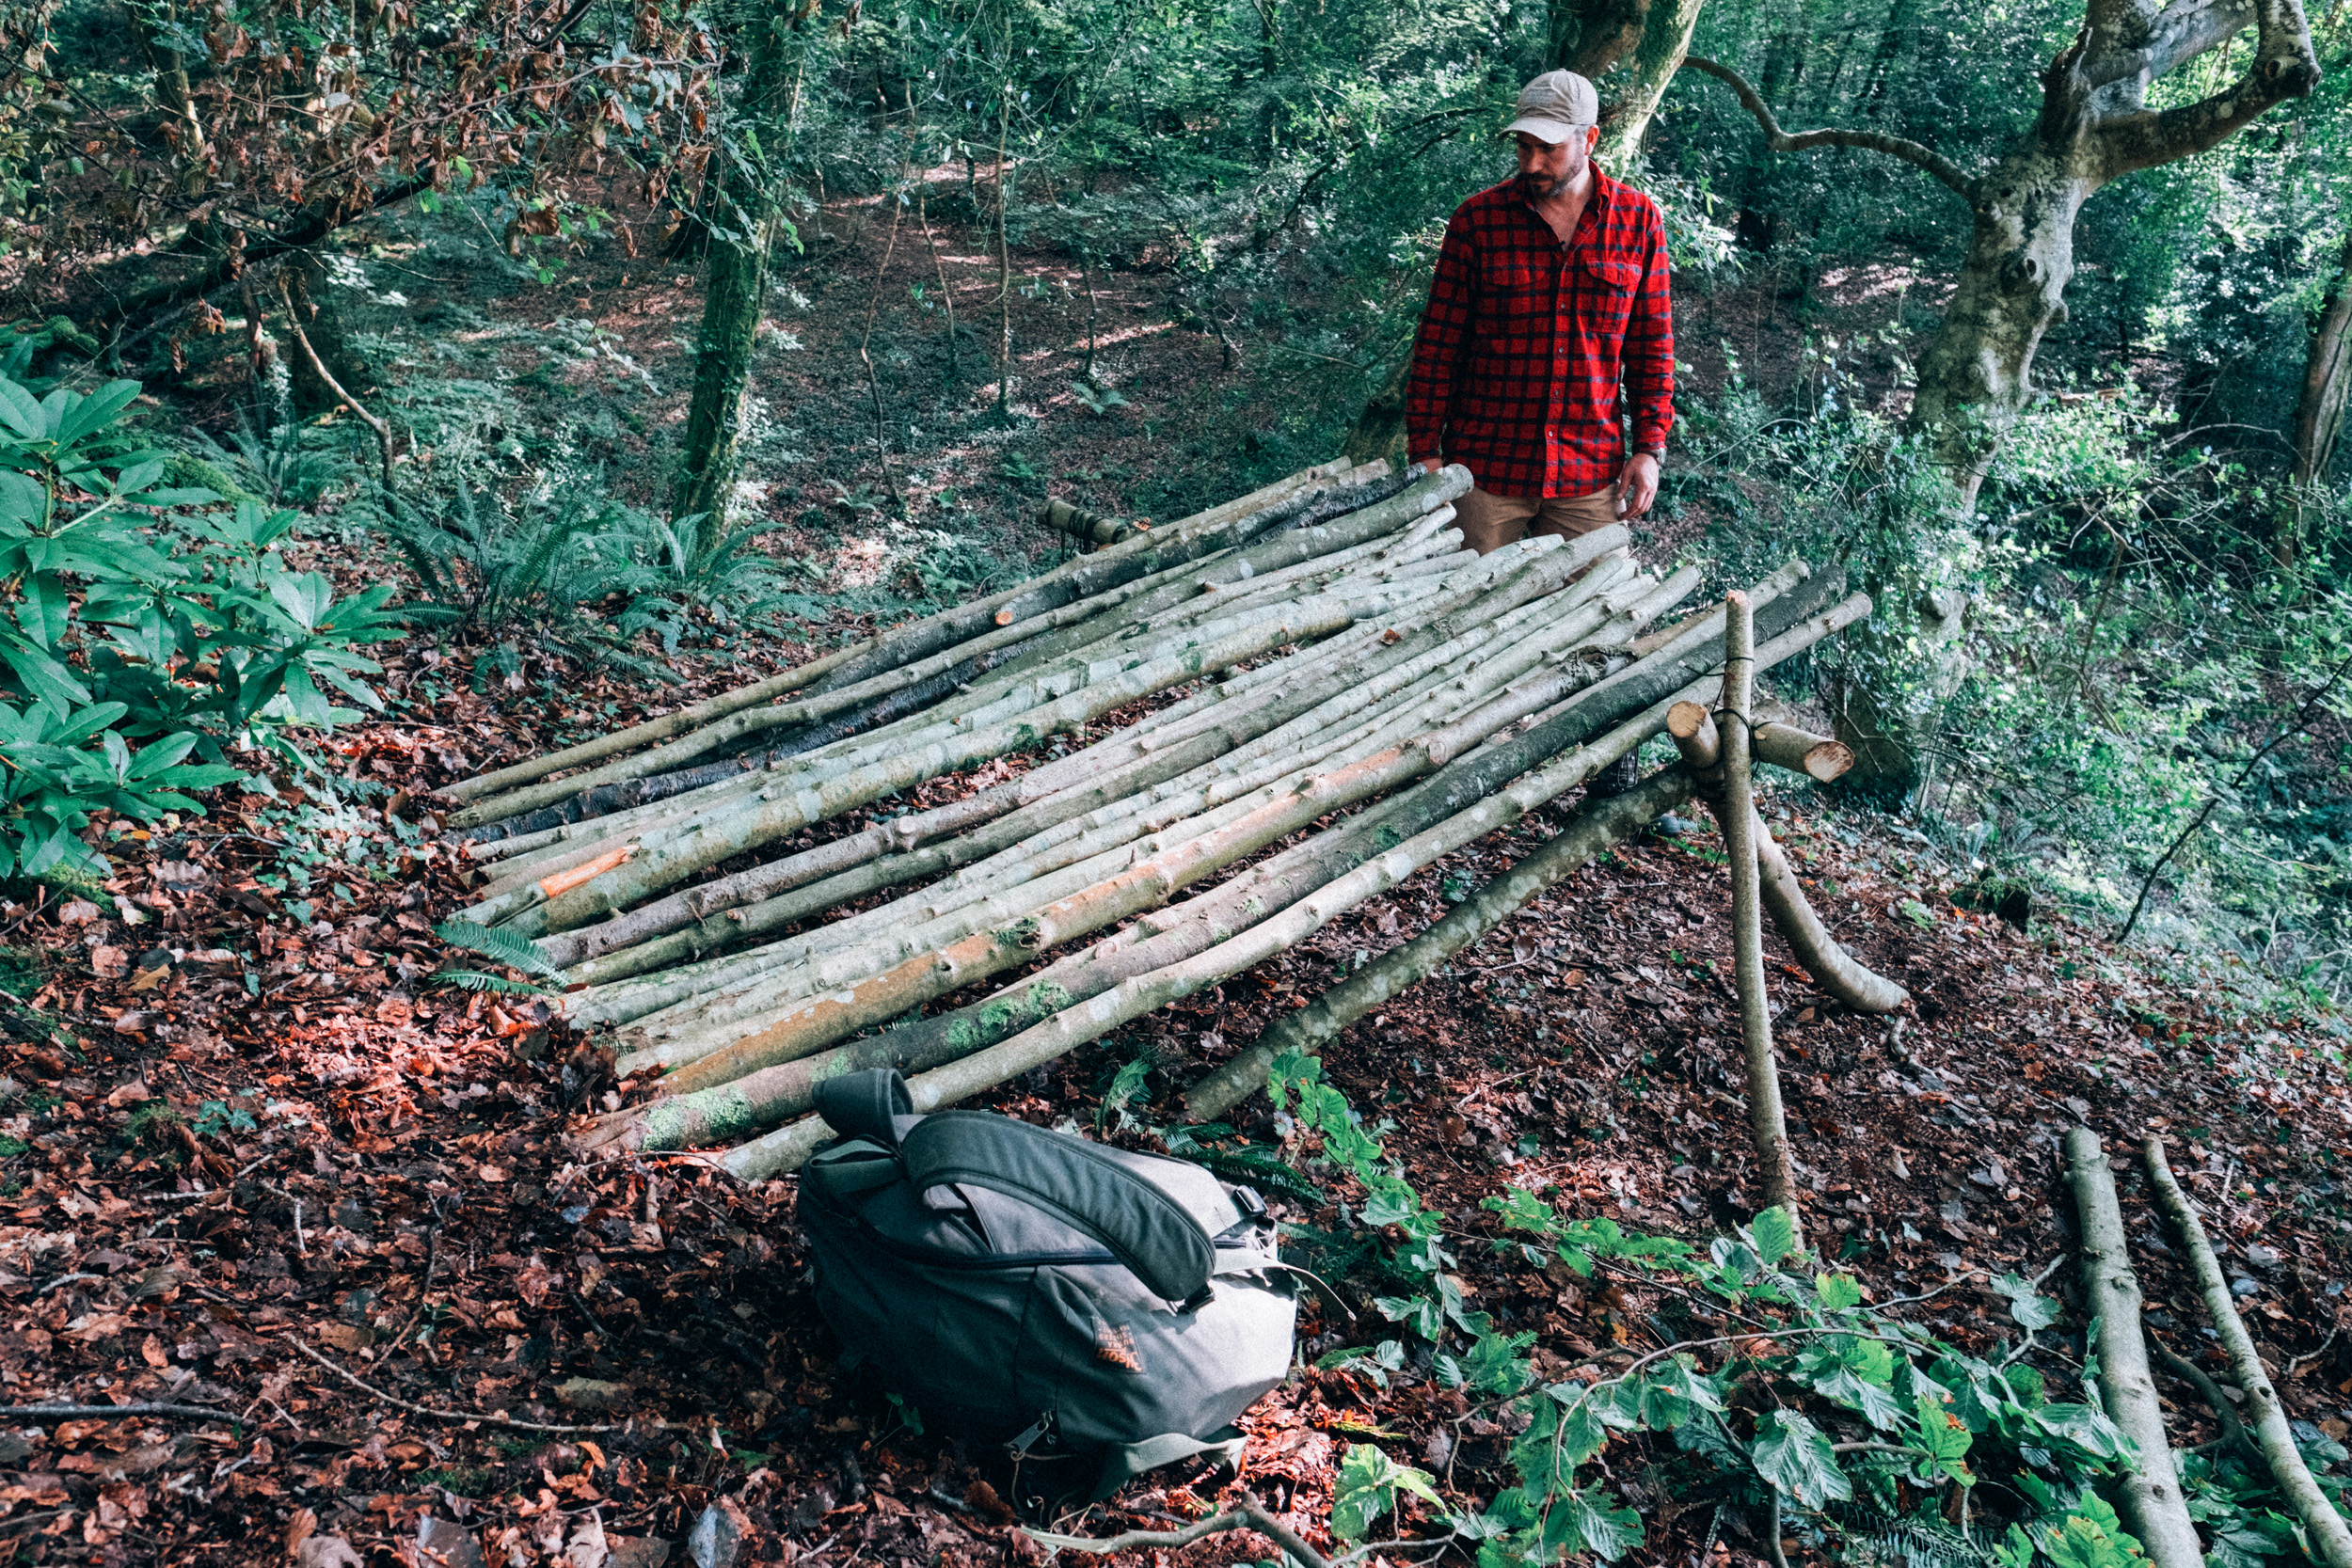
Choose wood carefully. When selecting the main lengthways pole, ensure it’s a few feet longer than you are. Any timber used should ideally be dead straight to maximise stability and mimimise any gaps. Try to use fallen logs for your structure if possible.
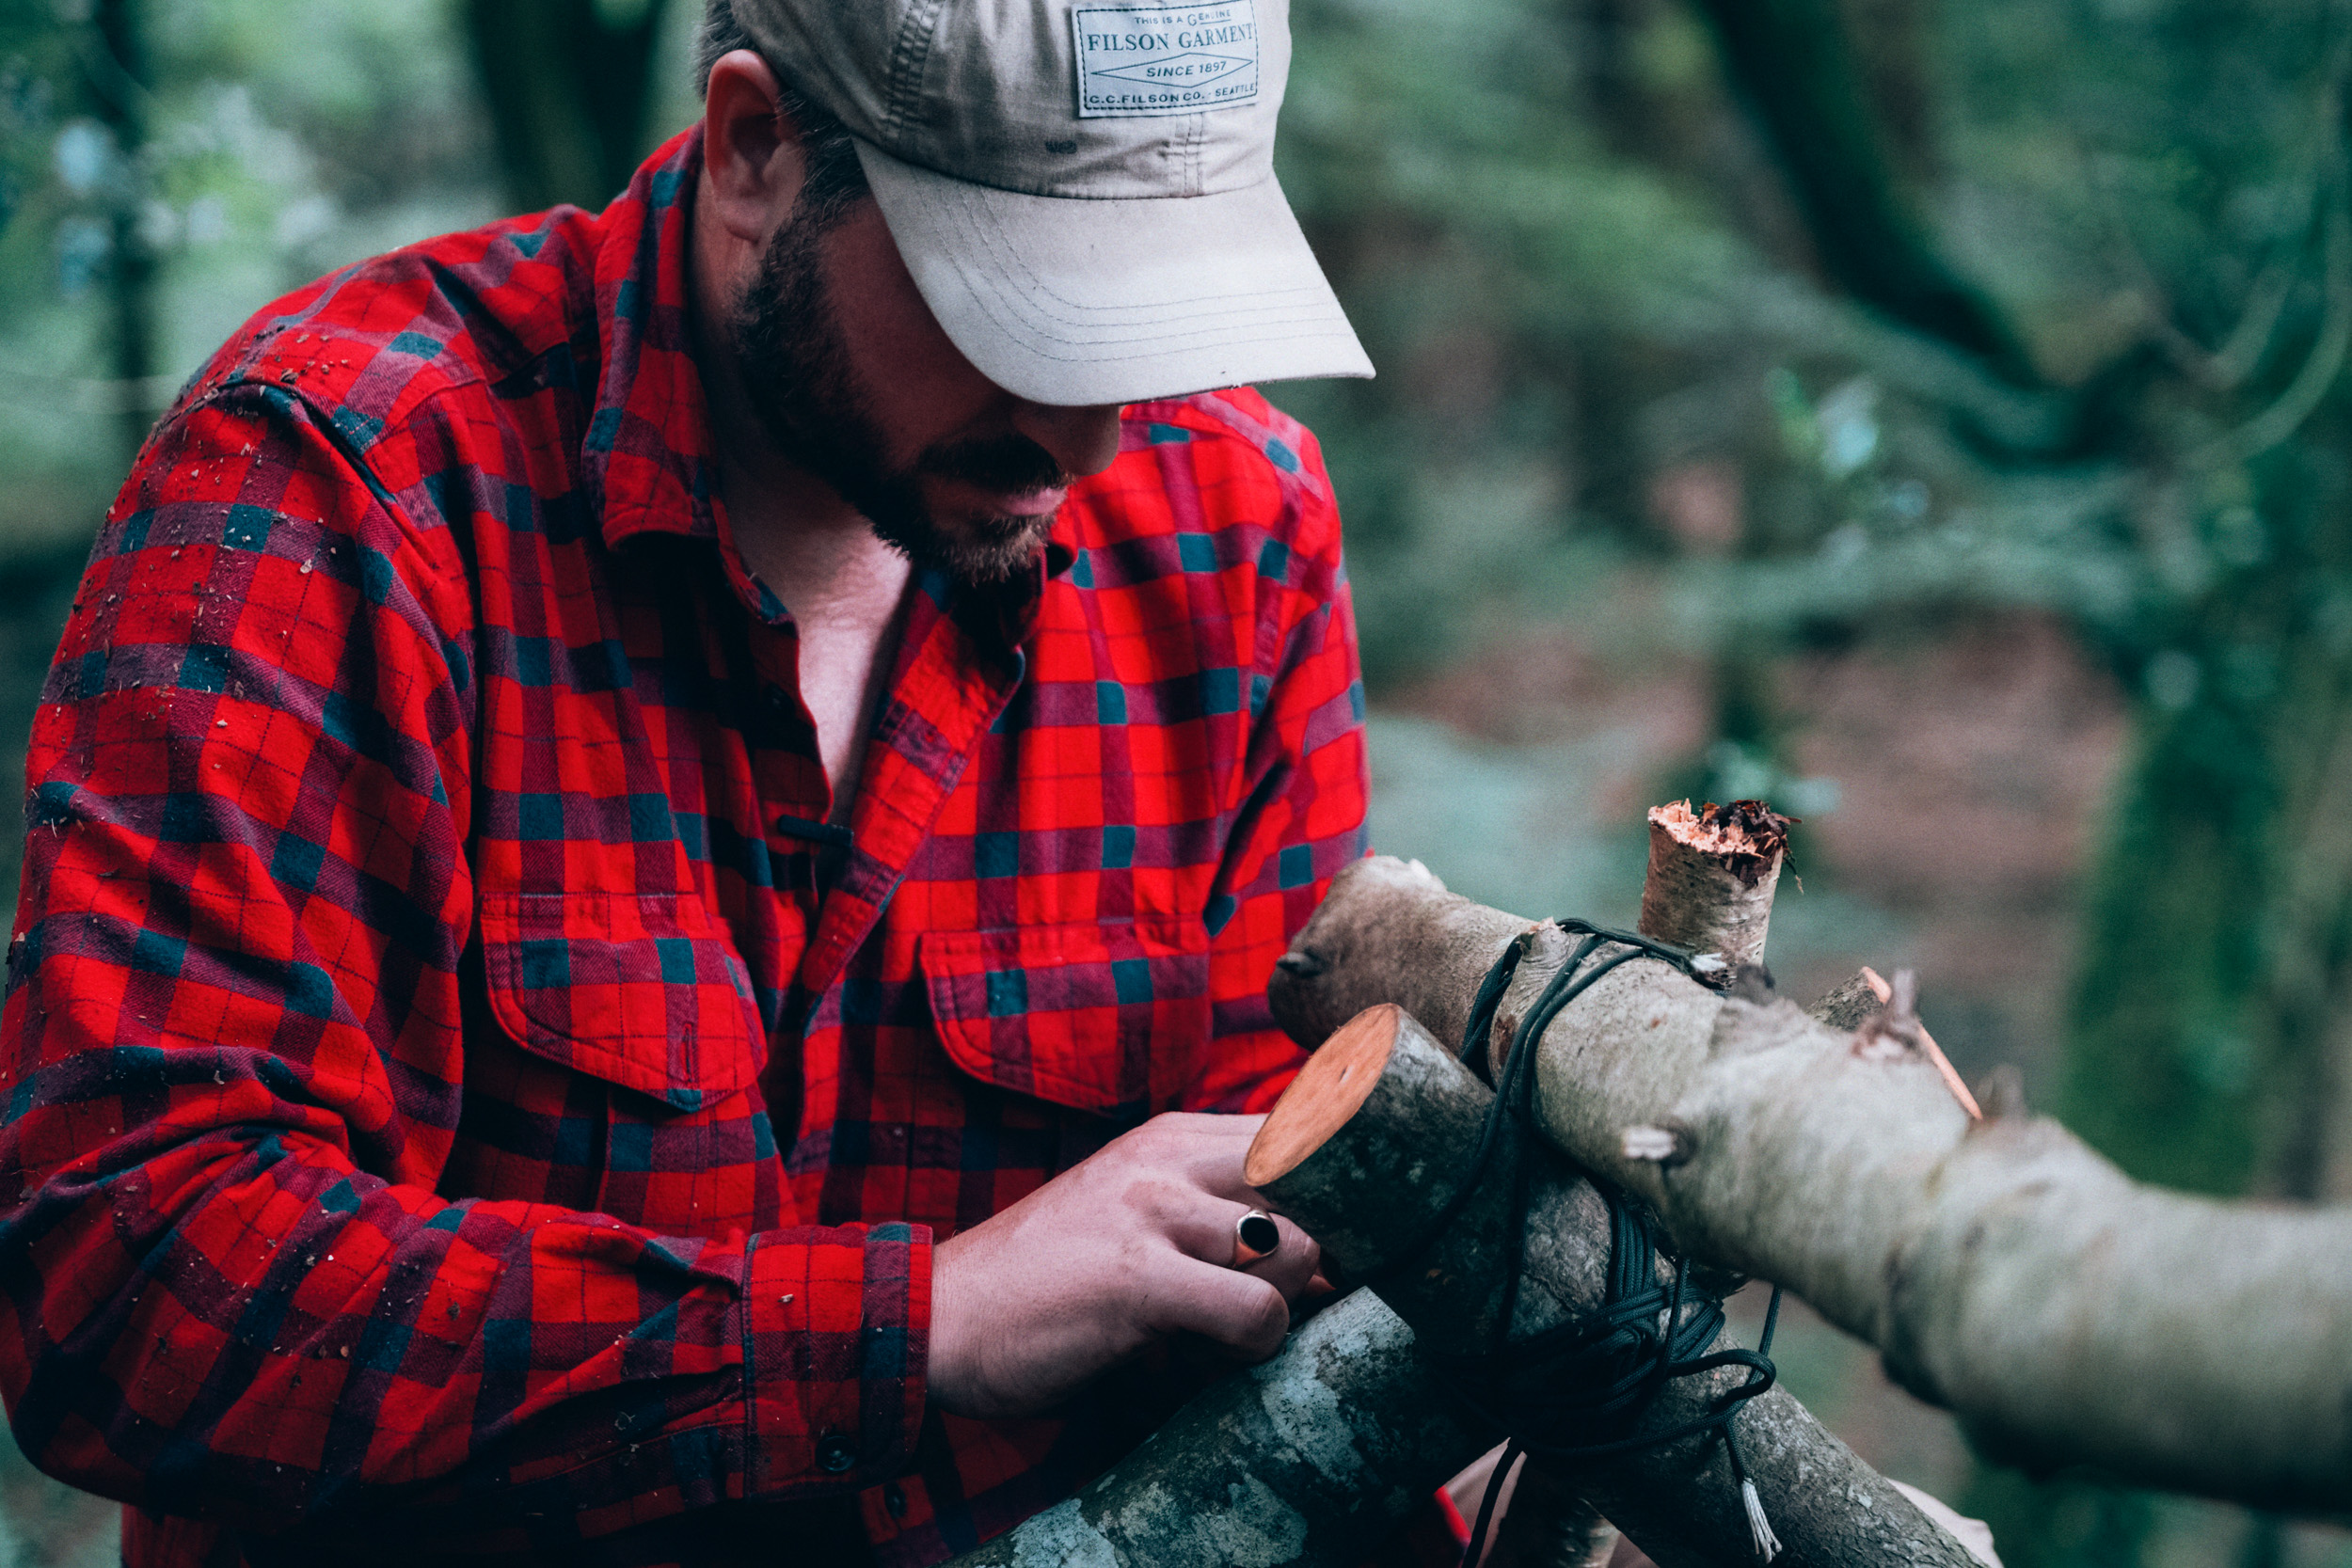
Put notches in the wood where they connect with other parts of the frame. This will make the structure much stronger and save you from having to rely too much on your lashing.
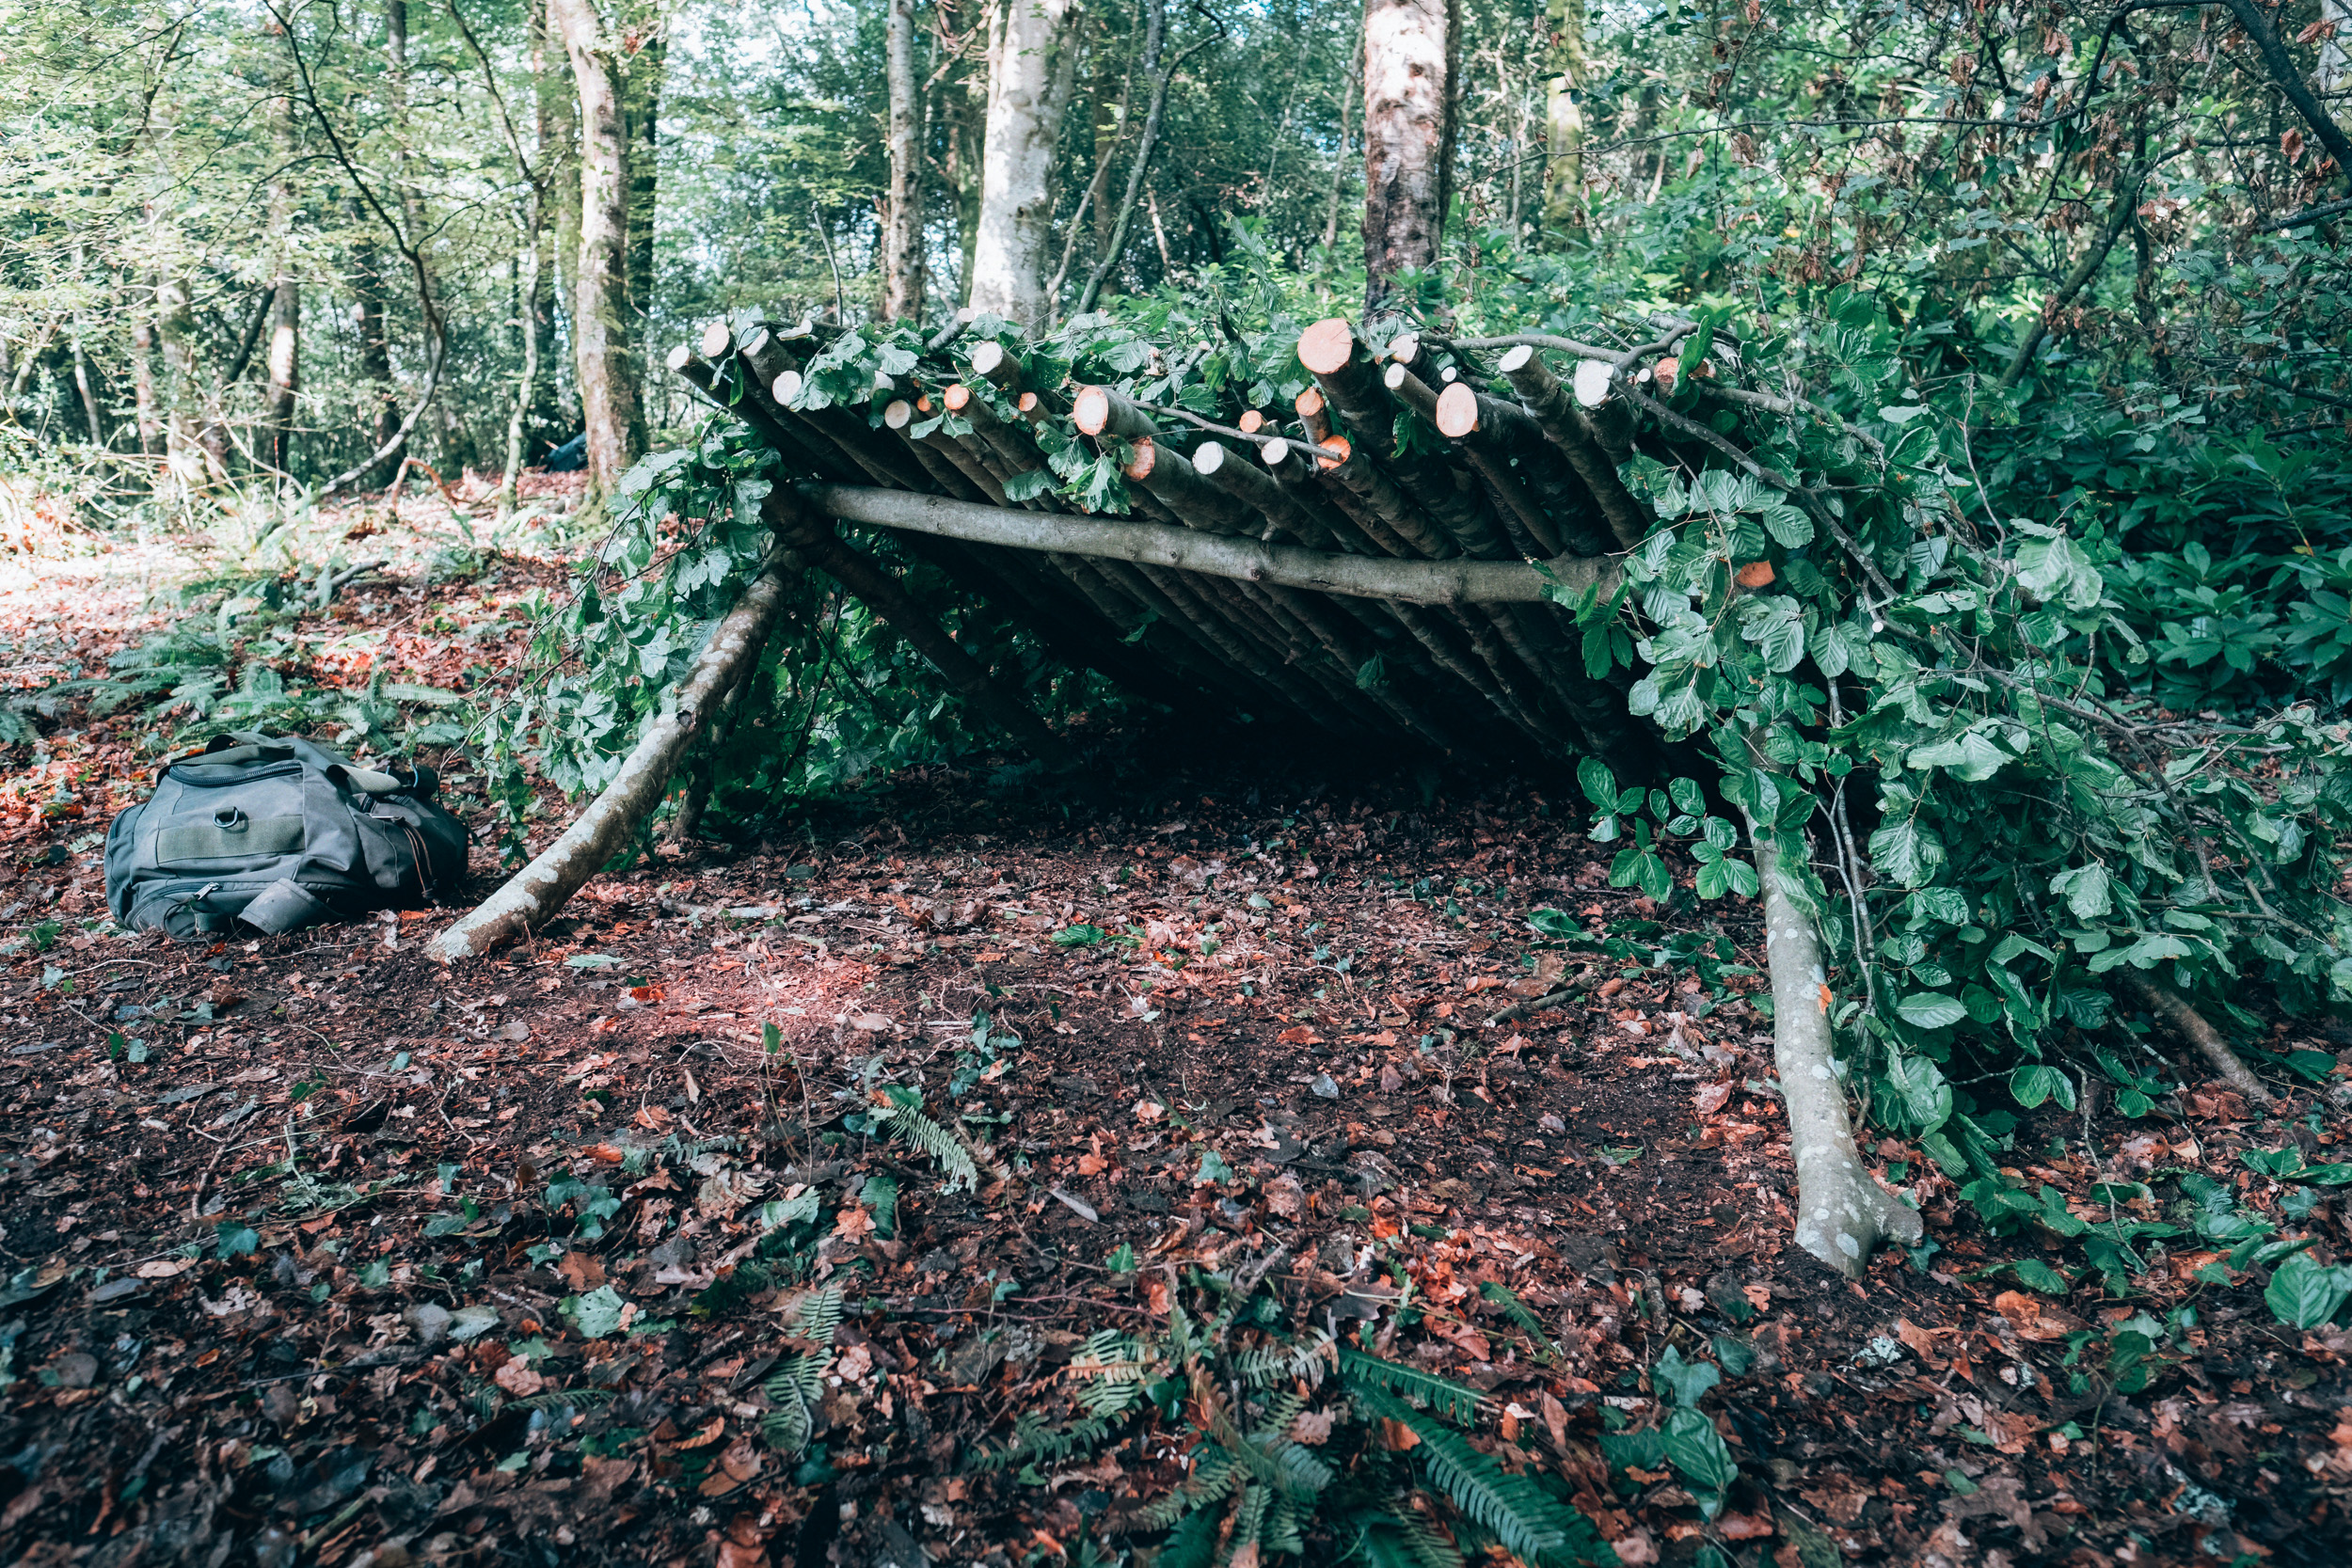
Make your shelter small and cosy – the less air space you need to heat up with your body, the better.
Leave a tag end to your lashing. This will be really convenient if and when you need to quickly add another support.
Bend the branches forward on each cutting used for the canopy to make sure the natural top of each leaf is actually facing down. This will slow down the rate at which water trickles off them.