How To Repair Torn Waterproofs - Outdoors Magic

Outdoors Gear, Equipment, News, Reviews, Forums, Walking Routes and More at OutdoorsMagic.com

Share

How To Guides

How To Repair Torn Waterproofs

Captain Paranoia talks you through his answer to crampon cuts and rips in shell clothing...

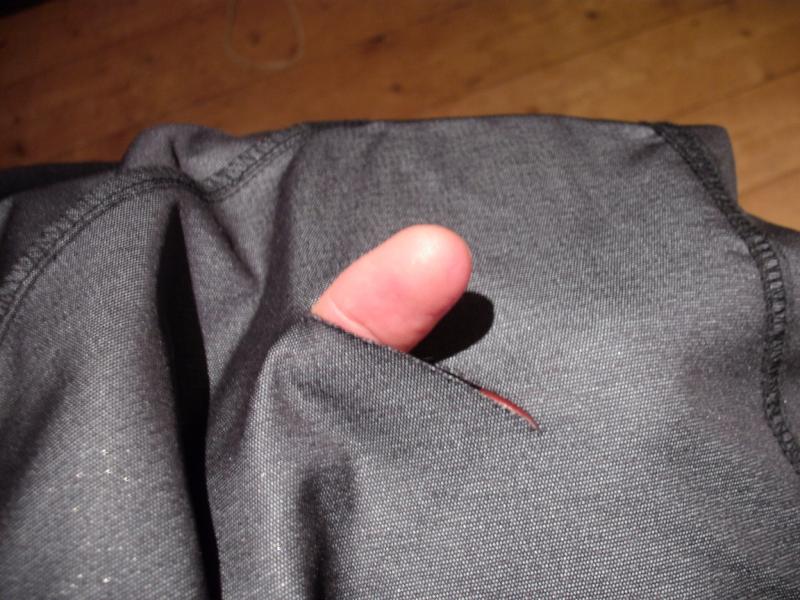
How to Repair a Cut in Waterproof Clothing the Captain Paranoia Way

Yes, it’s that time of year again, when the winter gear comes out, and you are reminded of the crampon tears and ski cuts that you never repaired at the end of last season. So it’s time to get the repair kit out, and get ready for the snowy season.

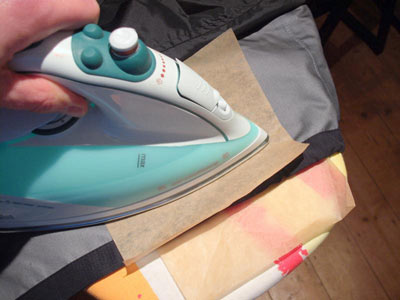
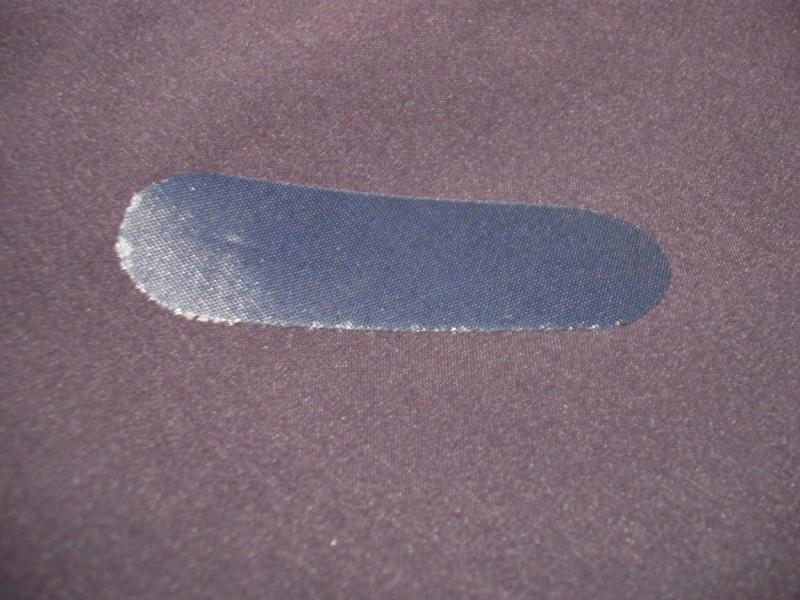
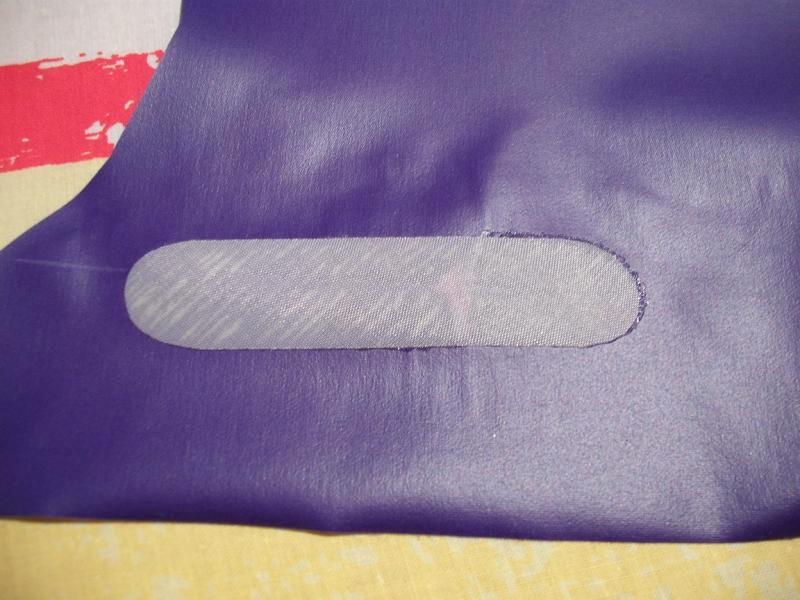
The method I’ve used for more than ten years, and have passed on to many other people who have also used it successfully, is to use iron-on seam seal tape. This is very similar to the seam seal tape used by manufacturers when making waterproof clothing. The advantages of it over other methods are are that is cheap, relatively easy to apply, seals the edges of the cut, and seems to last well.

The seam seal tape can be bought for less than £1 per metre from Pennine Outdoor or Point North, which should be enough for quite a few repairs. The 3-layer, reinforced variety is preferable and adds strength to the repair.

What You Will Need…

Apart from the seam seal tape, you’ll need the following:

  • scissors
  • dry iron
  • an ironing board
  • baking parchment (or brown paper)
  • masking tape
  • a tailor’s pencil

Note: the sequence below uses a composite set of photographs, one set taken repairing a real garment, and one using a scrap of waterproof fabric for illustrative purposes. I hope it’s not too confusing that garment and tape keep changing colour…

WARNING: before you start, be aware that most waterproof materials can react quite badly to high heat, so you need to satisfy yourself that the thermostat of your iron is working. Even then, it’s best to be cautious when you start applying heat to the repair; stop immediately if you detect any sign of the fabric melting or changing appearance (becoming shiny, for instance).

So, here’s the offending hole.

This example is in a three-layer fabric, with no lining or other complications.

First, cut a strip of seam seal tape about 4cm longer than the cut; this gives a 2cm overlap at each end.

Then use the scissors to round the ends of the tape. This reduces the risk of the patch snagging on things, and being torn off.

Cut a piece of baking parchment or brown paper, which will rest between the fabric and the ironing board, and stop the glue sticking to the ironing board.

Cut a second piece of baking parchment as big as the base of the iron. This will stop the iron getting glue on it, and will reduce the risk of damaging the fabric.

Place the garment over the ironing board, as if you were about to iron over the cut, and smooth the fabric down. You might need to support dangling bits of the garment on the ironing board to stop them pulling the cut open.

Carefully align the two edges of the cut, and try to minimise the gap between them. Without disturbing the cut, carefully place a piece of masking tape on the cut to hold the edges of the cut together.

(Yes, I know it’s suddenly changed colour…)

Now turn the garment inside out, and arrange it on the ironing board so that it is ‘relaxed’, with the fabric smooth but not being pulled tight. Again, you might need to support bits of the garment on the ironing board.
Line up the patch over the cut. This can be made easier by using a tailor’s pencil to draw a line extending either side of the cut, leaving a clearance of about 3cm either side (we don’t want chalk or wax under the patch). The centre of the patch can then be aligned with the tailor’s pencil line.
Place the second piece of baking parchment on top of the patch, being careful not to disturb the patch.
With the iron set to about 1.5 dots (in the usual range 0-3 dots), press the baking parchment and patch down with one hand (not shown here: other hand holding camera…) and gently place the whole iron over the patch area for a few seconds. This should just tack the patch in place, allowing you to lift the paper and check that it’s still aligned properly.

If the tape isn’t tacked into place, repeat for a few seconds longer. If the glue shows no sign of melting, turn the iron up to setting ‘2’.

Alternatively, if you feel the need for more control, you can tack one end of the patch with the tip of the iron…
… and then move the iron along the cut, feeding the tape and baking parchment under the iron, guiding the tape into place along the cut.

Bear in mind that you need to do this quite quickly, so as not to overheat the fabric; we’re looking for a contact time of about 20 seconds or so.

When you’re happy that the patch is in the right place, now is the time to remove the masking tape. You may need to let the whole thing cool down completely to do this to ‘set’ the masking tape glue again. A short spell in the freezer can help.

Now we can fix the patch firmly. Replace the baking parchment over the patch, and use tip of the iron to press down firmly for about twenty seconds, during which time you can run the tip of the iron up and down the length of the patch; imagine pressing the collar of a shirt. Try not to run the iron across the cut, as this can encourage the sides of the cut to open up
Here’s a picture of the finished result. If the glue has melted properly, you may see shiny specks around the edge of the patch, where glue has been pressed out, or the patch has moved slightly during pressing. Let the patch cool completely, and then try to peel the edges; you should not be able to shift the patch at all. If the edges show any sign of lifting, re-apply the iron for a little longer.
Here’s the other example. I’d peeled the tape off once, using a reverse of the tape feeding process, trying to get a perfect result for the article. It didn’t quite turn out like that. It does show how the glue extends around the edge, though…
Well, it didn’t turn out that badly. See if you can spot the join.

Lined items

Garments that are lined pose a bit more of a complication if you want to apply a patch on the inside (for cosmetic reasons). Whilst the baking parchment and tape can go through the hole before the patch is applied, it’s a bit harder to remove the paper afterwards. One way is to cut a small hole in the lining, and remove the paper through the hole, and sew the hole up afterwards (a blanket stitch works well with mesh and micropile linings). Of course, you can risk not using the paper, and having the lining stick to the patch…

Here’s an example of a pair of salopettes with a micropile lining.

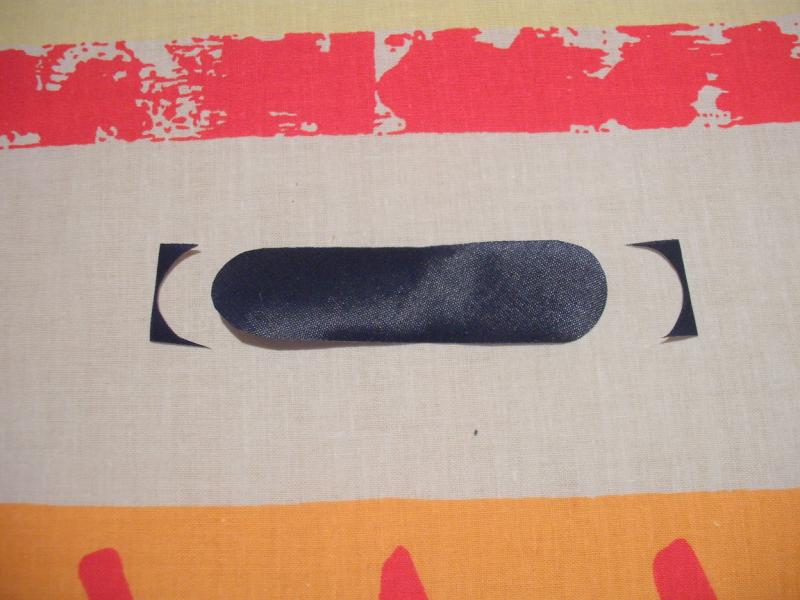
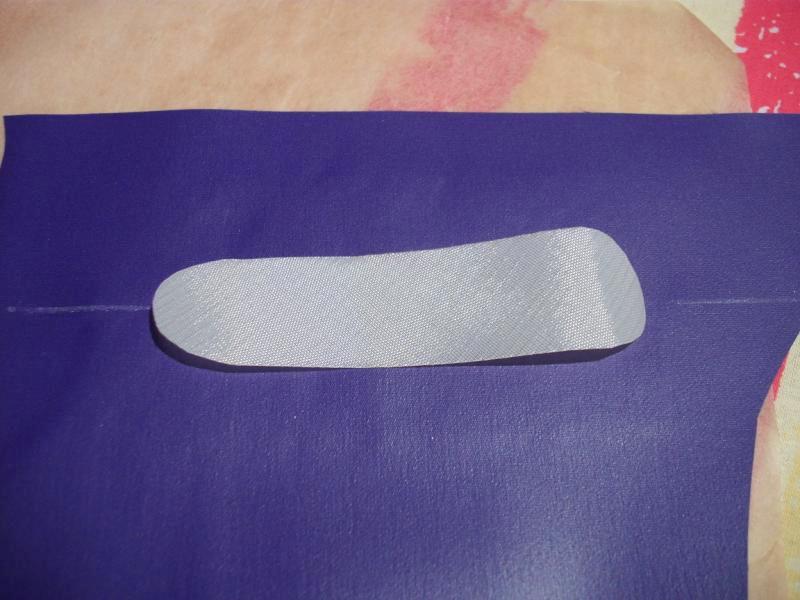
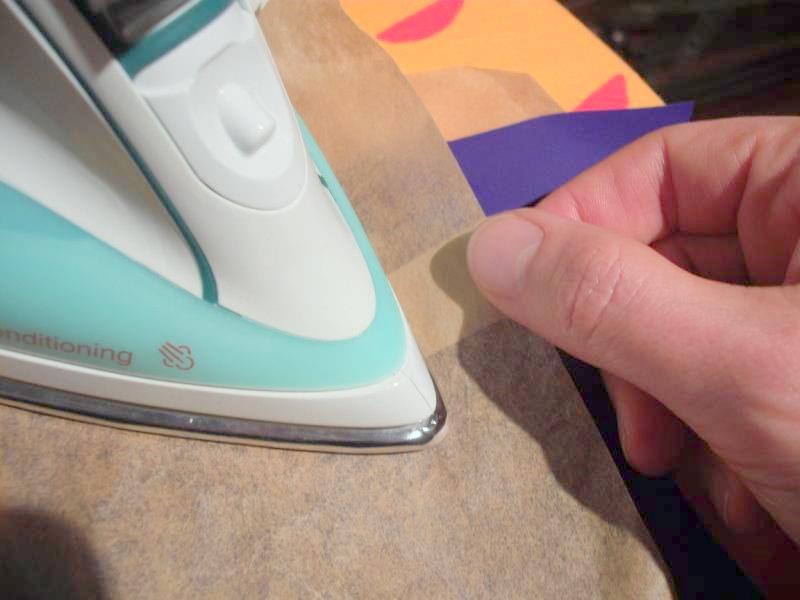
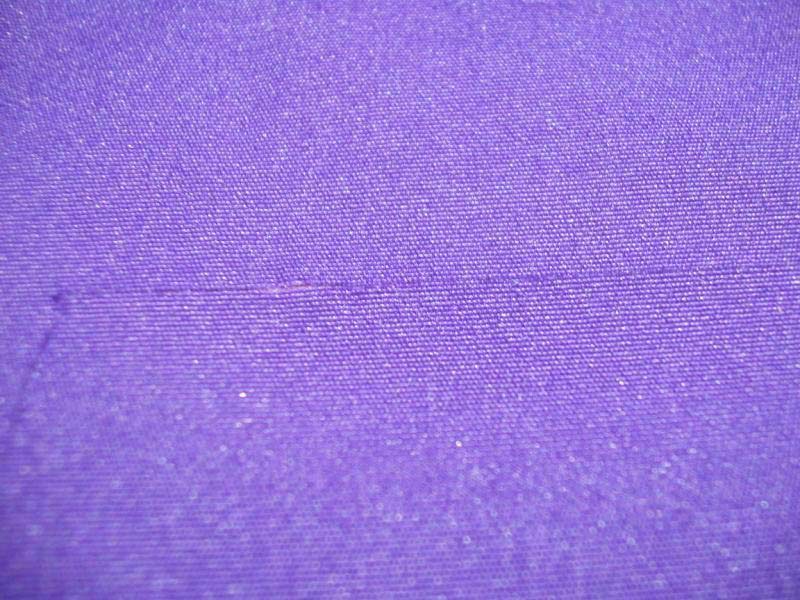
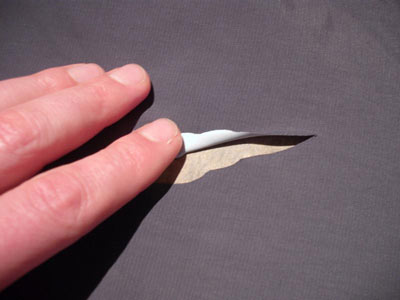
I’ve already put the paper in the hole, and aligned it. All that’s needed is to insert and align the tape. Again, the tailor’s pencil can come in handy; in this case, draw a couple of dots in the centre of the tape, slightly inside the ends of the cut. You can use these to align the patch relative to the cut.

Applying heat from the ‘other side’ of the patch allows you to see exactly where the iron is, so you can fix the tape to one side of the repair, and then carefully align and fix the tape to the other side of the repair, ensuring a very neat join.

Notes

For patches in stressed areas (knees, seat, etc), it may be worth applying a patch on both sides of the fabric, to provide more mechanical strength to the repair.

For sleeves and trouser legs that won’t fit onto the ironing board (unless you have one of those special ‘sleeve boards’), you’ll need to flatten them as well as you can, and insert the baking parchment inside the arm or leg, to stop the glue sticking the sides together.

If the patch starts to come undone in use, you can simply re-apply heat to the tape again, to re-glue it.

If you do end up with glue on the iron, find a piece of scrap fabric such as an old t-shirt, turn the iron up to 3 and rub the glue off onto the t-shirt.

Note that not all waterproof coatings are compatible with the glue used in the tape. Polyurethane and neoprene coatings work very well, and most 3-layer fabrics will also take the glue well (binding the to inner ‘scrim’), but pure, 2-layer ePTFE fabrics may not work (air permeable Gore-tex and Event); I’ve not had to repair these yet, so I can’t say whether they’ll work. You can always stick the patch on the outside. The glue won’t stick to silicone-coated fabrics.

© 2009 Kevin Beeden, aka captain paranoia

Share

Newsletter Terms & Conditions

Please enter your email so we can keep you updated with news, features and the latest offers. If you are not interested you can unsubscribe at any time. We will never sell your data and you'll only get messages from us and our partners whose products and services we think you'll enjoy.

Read our full Privacy Policy as well as Terms & Conditions.

production